Straw Bale Gardening Demonstration - 2015
Home » Horticulture Center » Vegetables » Straw Bale Gardening » 2015

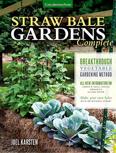
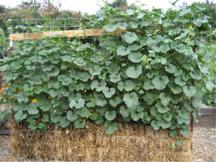
In straw bale gardening, the bales are the container (a type of raised bed) as well as the growing media. As the straw inside the bale decomposes, it provides nutrients for the plants. The straw will continue to decompose and the bales will collapse over the winter, and then will be used as mulch in our raised beds next year.
We started out by “conditioning” the wheat straw bales (we used rice straw in 2014), the process of getting the bales to compost internally so root growth can be supported. Using a very precise 3-week fertilization and watering schedule as set out in both books, blood meal, fish meal, bone meal, and kelp meal, (all organic fertilizers) were applied and watered in. We chose to use organic fertilizers, but a high nitrogen lawn fertilizer could be used as well for a little faster and less expensive, non-organic conditioning process.
As we experienced in the two previous experiments, the use of blood meal was very unpleasant. Combine that with fish meal, and the odor was quite smelly. In 2013 and 2014 we used feather meal with the blood meal, and the odor was bad enough. This year was epic in the "stinky" department, and the smell attracted legions of flies. The bales had to be covered with chicken wire to keep critters from digging in the straw. When using those organic nitrogen fertilizers, we definitely do not recommend placing the bales near your back door or any other place where the odor could be a problem. However, once the conditioning process was over, the odor diminished considerably.
The temperature of the interior of the bales was taken each day during the conditioning process, and we noticed that it did not heat up as much as in previous years (a peak temperature of only 110ºF); however, it did heat up enough to activate bacteria inside the bales to start the decomposition of the straw. At the end of the conditioning process, mushrooms appeared on the surface of the straw, a sign that the inside of the bale had decomposed nicely. We noticed that the mushrooms were much more prolific than in previous years, and they persisted in a dried state throughout the growing season, giving off a somewhat "toasty" aroma. While the presence of mushrooms was a good sign, there is the possibility that when they push up through the straw, they could dislodge seeds that are planted in the bales. We did not experience this because we used well-established transplants that were not disturbed by the emerging mushrooms.
The same irrigation method (shrubblers attached to ½-inch supply line) and fertilization schedule (monthly fish emulsion) that were used in 2013 and 2014 were again used in 2015 (see 2013 straw bale gardening demonstration article for irrigation and fertilization information).
It is critical that the strings that bind the bales be kept taut at all times. If the strings loosen as the straw decomposes, compression will be lost and the interior of the bales can dry out. Keeping the bales tightly bound was one of our biggest challenges in 2013 and 2014; however, we did not experience collapsing bales this year. Our assumption is that wheat straw does not decompose and break down as quickly as rice straw (which we used in 2014). Another factor could be that the wheat straw was baled differently than the rice straw.

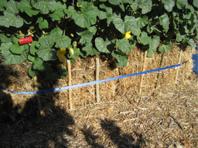
To our surprise, both bales held together very well with minimal collapsing. Because the bales were in such good shape at the end of the summer growing season, we decided to plant cool-season crops in the bales after the melons and squash were removed.
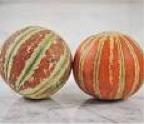
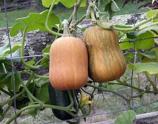
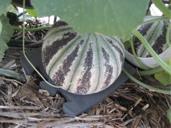
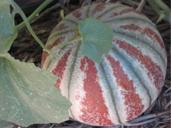
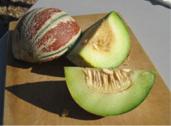
We harvested our first ripe melon on July 15, 2015, (60 days from transplanting) and had an informal tasting among the Master Gardeners who work in the vegetable demonstration garden. The melon turned from a dark green with light stripes (left below) to a beautiful orange (middle below) and it slipped from the vine when it was ripe in the same manner as a muskmelon/cantaloupe. The soft green flesh (below right) was reminiscent of a honeydew melon in flavor but was a bit more complex (some tasters noted a bit of saltiness).
|
|
|
By the end of the growing season, we harvested 11 'Kajari' melons and 26 'Honey Nut' baby butternut squash before the plants were removed on September 23, 2015.
Conclusions: With the exception of the malodorous issue during the conditioning process, we have had nothing but positive impressions about growing in straw bales. They can be placed almost anywhere, they retain moisture extremely well as long as they are kept under compression, the bales make a relatively inexpensive (albeit temporary) raised bed, the labor involved in maintaining the bales was minimal (no weeding), and the following season the decomposed straw can be used as mulch in the garden. We highly recommend growing vegetables in straw bales, especially if the soil in the garden has diseases, nematodes, weeds, or is contaminated in some way.
Because we experienced wide-spread fusarium wilt on tomatoes in the raised vegetable beds at the FOHC, we plan to try growing several tomato varieties in straw bales next year.
Resources
- Straw Bale Gardening (PDF) Garden Note 160, explains the basics for starting a straw bale garden in your yard.
- Return to our Straw Bales introduction for links to other years.
- There is also a free ANR publication on straw bale gardening (PDF).
- The book Straw Bale Gardens (Joel Karsten, Cool Springs Press) provides detailed information about setting up the straw bales and all aspects of straw bale gardening. The author's website also provides information and photographs that may be helpful if you would like to try growing vegetables in straw bales.


