Beyond Lawn
Home » Fair Oaks Horticulture Center » WEL Gardens » Lawn Removal Methods
Lawn Removal Methods
You may remove a lawn for several reasons: to reduce landscape water use by replacing lawn with drought-tolerant plants or plants that attract wildlife and pollinators, or to convert the area to another landscape use.
Sounds great, but what is the best way to remove your lawn? Start by identifying your lawn type: Green-in-winter, Brown-in-winter, Patchy. Select a removal method: Sheet mulching, Solarization, Sod removal, Herbicide.
For a printer-friendly version of this page, click here for Garden Note 161. (PDF 257kb)
Need ideas for planting after the lawn is gone?
- Visit our list of water efficient plants for color and beauty all year.
- The UC Davis Arboretum All-Stars are low maintenance plants for our Mediterranean climate.
- The UC Davis Arboretum Planting Plans offer ideas for using drought tolerant plants to attract wildlife for sun or shade gardens.
Lawn Type | Sheet Mulch | Solarization | Sod Removal | Herbicide
Lawn Type
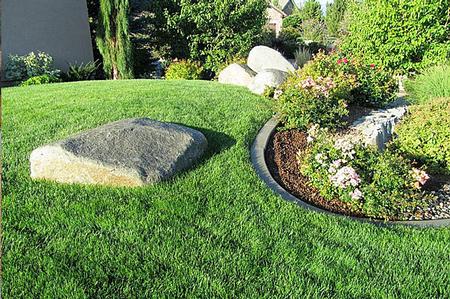
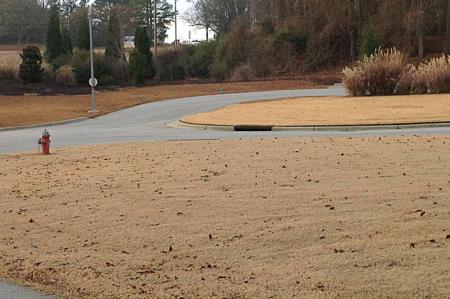
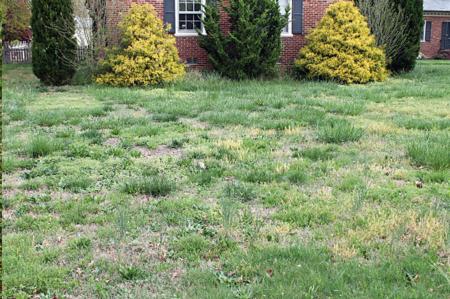
Lawn type is needed to select an appropriate removal method. There are three main lawn types. Pictures enlarge on click.
| Green-in-winter lawn. These grasses grow in the cool season and are varieties of fescue and bluegrass. Green-in-winter grasses are more difficult to grow in California’s Mediterranean climate, and easier to kill. |
|||||||||||||||||||||||||
| Brown-in-winter lawn. These grasses grow in the warm season and are dormant and brown in the winter. They include Bermudagrass, St. Augustine grass and Zoysia that have extensive and often deep root systems. Brown-in-winter grasses are easy to grow in California’s Mediterranean climate and hard to kill, because new plants grow from small pieces of underground stems or roots deep in the ground. | |||||||||||||||||||||||||
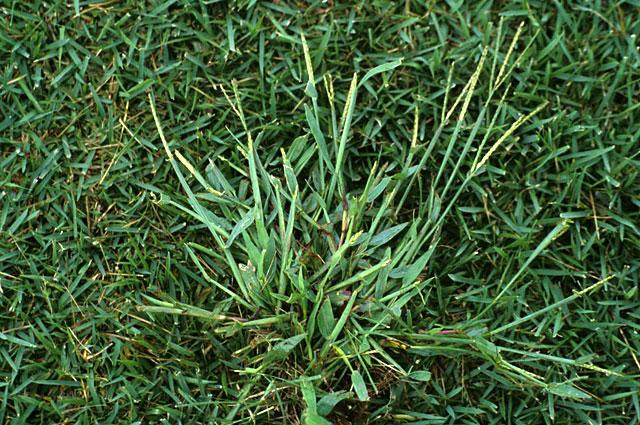
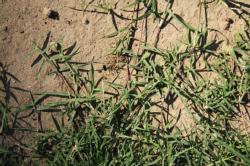
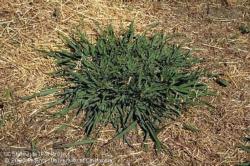
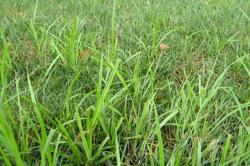
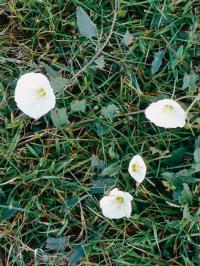
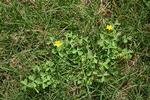
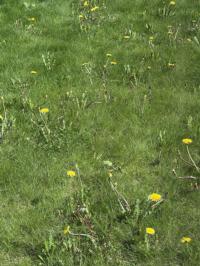
| Patchy grass with weeds. Many lawns start out as a single variety of grass and over the years other plants invade portions of the lawn. Often the invading plants are weeds such as crabgrass, Bermudagrass, dallisgrass, nutsedge (incorrectly called nutgrass), bindweed, creeping wood sorrel (also called oxalis), and dandelions. These weeds grow readily and are hard to kill. Below are common lawn weeds. Thumbnail pictures enlarge when clicked and text links will take you to more information about that weed.
|
Lawn Type | Sheet Mulch | Solarization | Sod Removal | Herbicide
Sheet Mulching
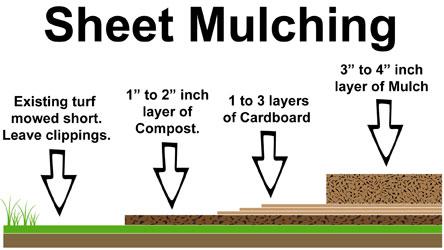
The method does not use heavy equipment or chemicals. Any run off water is unlikely to pollute wastewater, streams or rivers. As the sheet mulch decomposes over time, it improves the soil for future plant growth.
Gardeners have used sheet mulching for many years and the order of layers is the biggest difference between users. The compost layer is sometimes placed above the weed barrier. There are no definitive scientific studies on the effectiveness of the order of layers when used on different lawn types or in various climates. The recommendations in this Garden Note are based on local success with brown-in winter and patchy lawns.
Lawn types sheet mulching works for and when to start:
Sheet mulching works for all three lawn types, though there are slight modifications for each. It can be started at any time during the year.
Calculate the amount of compost, weed barrier and mulch needed for the square footage of lawn to be removed (see table below). Large quantities of cardboard or newspaper may be needed, so if you do not plan to buy these materials, start collecting them in advance.
Site preparation:
Mow the lawn short as your mower will go and leave the grass on the lawn.
Mark any sprinkler heads in the area to be sheet mulched to avoid damaging them while digging the edges and for potential future conversion to drip irrigation.
Water the lawn thoroughly to speed the decomposition of the lawn.
Dig out the edges of the lawn three inches deep and eight-twelve inches wide next to walkways, driveways and lawn edging. This will prevent water run-off and erosion from the sheet mulched area, as the finished edge will be level with the existing grade. The soil that is removed can be piled on the lawn to create mounds, or used elsewhere in your yard, if it does not contain invasive weeds.
Installing the compost, weed barrier and mulch:
If the area is large, it may be easier to install the sheet mulch in small portions.
See table below for details on the layers for each lawn type.
Spread a layer of compost over the lawn.
Create the weed barrier by covering the compost with cardboard, stacks of newspapers or builders paper.
If a piece of weed barrier does not cover the whole area, use several pieces being careful to overlap each edge by 6 inches so the area is completely covered and no light can get below the barrier. If the pieces of weed barrier shift over time, the overlap will prevent the light from getting through.
Wet down the weed barrier as you go to keep it in place while you complete the job.
Spread mulch over the weed barrier.
This table details options for the layers and how much to use for each lawn type.
| Sheet Mulch Layer | Green-in-winter Lawn | Brown-in-winter and Patchy Lawns |
| Compost | 1 to 2 inches | 1 to 2 inches |
| Weed Barrier - choose type: | ||
| Cardboard (not shiny/waxed) | 1 heavy layer | 2 to 3 layers |
| Newspapers | 6 layers | 6 to 12 layers |
| Builder's paper | 2 layers | 3 layers |
| Mulch - choose type: | ||
| Straw or grass clippings | 6 inches | 8 inches |
| Wood chips | 3 inches | 4 to 6 inches |
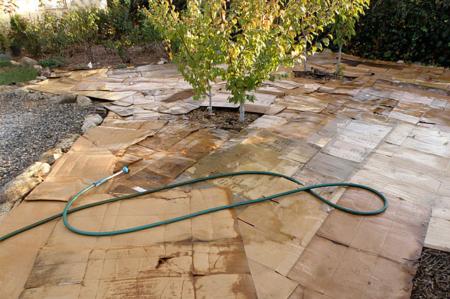
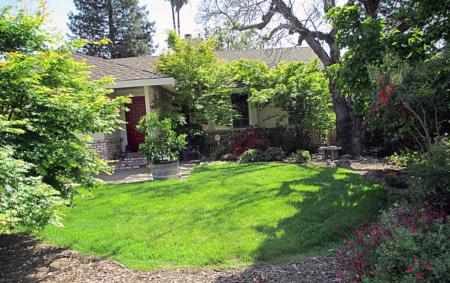
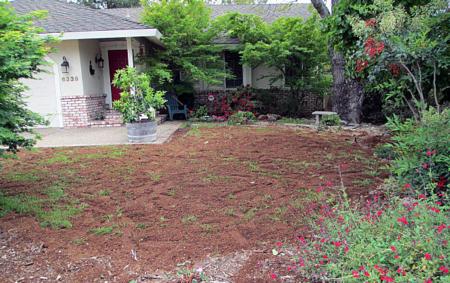
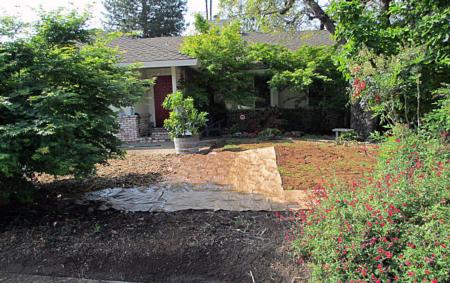
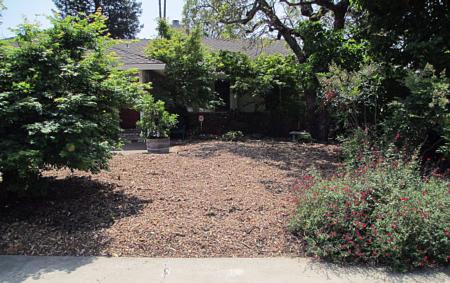
The following photos by Kyle D'Alquen show the sheet mulching process using builder's paper as the weed barrier layer.
What to do after installation
Water the sheet mulched area to speed up decomposition of the lawn and the cardboard/paper layer. Water less frequently than a growing lawn, water only until it is moist down to the soil. The mulch layer will conserve water on the sheet mulched area.
Time required for lawn to die
Green-in-winter lawns take 1 to 3 months.
Brown-in-winter and patchy lawns will take at least 3 to 8 months.
Planting after the lawn has died
Planting should only take place after the lawn has died. If the lawn is still alive, the grass and weeds will return through the holes created when installing the new plants. Weeds compete with the new plants and weeds can be difficult to permanently remove.
The best time to plant is fall. In the fall the soil is still warm, but the days are cool so plant roots grow rapidly. In a typical year, the plants get rain during the winter and have time to develop healthy root systems before they are exposed to the summer heat. The second best time to plant is in the spring. More irrigation water is needed for spring plantings.
Pull the mulch back from where the plant will be planted. Cut through the cardboard and dig into native soil. Plant the plant. Lay the edges of the cardboard back around the new plant, but do not lay the cardboard against the stem/trunk.
Re-spread the mulch, keeping it a few inches away from the stem/trunk.
Be vigilant and watch for Bermudagrass or other persistent weed sprouts for up to 2 years. It is easier to get rid of weeds if they are removed when they are small.
Lawn Type | Sheet Mulch | Solarization | Sod Removal | Herbicide
Solarization
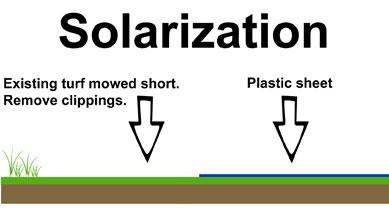
Solarization only works in summer in hot summer areas. The lawn must receive full sun for 6 to 8 hours each day. Flat areas are easiest to solarize. Foot traffic (both people and pets) must be limited when the area is being solarized to prevent tears in the plastic which let the heat escape.
The method does not use heavy equipment or chemicals. Any run-off water does not pollute wastewater, streams or rivers. It kills plant disease causing fungi and bacteria, nematodes, weed seeds and weed seedlings in the top 3 to 4 inches of soil. Beneficial soil fungi and bacteria are also killed, but generally return quickly after the treatment. Earthworms are thought to retreat lower in the soil and generally return quickly after the treatment.
Lawn types solarization works for and when to start
Solarization works for green-in-winter lawns.
It is less likely to be effective for brown-in-winter and patchy lawns, because the grasses and some weeds may regrow from roots, stems or seeds that are below the top 3 to 4 inches that are solarized. Bermudagrass may regrow from underground stems and roots the summer following the solarization.
Solarization only works in hot summer areas. Start the solarization in the summer so it will be completed before the end of September.
Site preparation
Remove all twigs, plants with thorns, or other material that could puncture the plastic.
Mow the lawn short and leave the grass on the lawn.
Mark any sprinkler heads in the area to be solarized to avoid damaging them while digging the edges and for potential future conversion to drip irrigation.
Water the lawn thoroughly to speed the heating process.
Dig out the edges of the lawn 6 inches deep and a few inches wide next to the outer edges of the lawn. This trench will be filled with soil, sand or rocks to seal the plastic layer over the lawn.
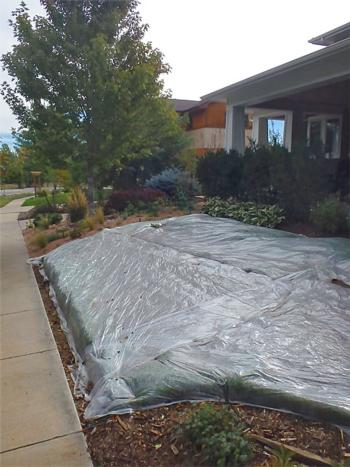
Clear plastic is most effective in hot summer areas, as the sun’s rays pass through the plastic and heat the soil below. Black plastic is less effective because it absorbs some of the heat rather than letting as much heat pass through to the soil below. UV resistant plastic is best; regular plastic may break down and need to be replaced before solarization ends.
Thin plastic (1 mil) is most effective at transmitting the heat, but tears easily; 1.5 to 2 mil plastic works well.
If a single piece of plastic will cover the lawn area, lay the plastic over the lawn with one edge in a trench.
Top the plastic in the trench with the soil, sand or rocks to hold the plastic down.
Pull the plastic edge opposite the filled trench so the plastic is close to the lawn. Put the edge of the plastic in the opposite trench. Top the plastic in second trench with the soil, sand or rocks. Repeat pulling the plastic close to the lawn and filling the trenches for the remaining edges.
If the plastic does not cover the entire lawn and seams are needed, lay the plastic pieces out allowing a 6 inch overlap on any seams. Seams and edges of the plastic allow air to penetrate and as a result, these areas may not get hot enough to kill grass. These areas should be monitored in the future for plant re-growth.
Either start at one edge as described above, or create the overlapped seam first and cover the seam with the sand, soil or rock to form the seal.
If starting from the seam, pull the plastic from the seam towards one of the edge trenches on the edge and fill the trench.
Repeat pulling the plastic close to the lawn and filling the trenches until the whole lawn is covered.
What to do after installation
Limit pets and people walking on the lawn.
Examine the plastic regularly to make sure there are no tears. Use clear packing tape or duct tape to patch small holes.
Add sand, soil or rocks in the trenches or on seams, if needed, to maintain the seal.
Replace the plastic if it is not UV resistant and breaks down before the end of the solarization process. Follow the steps on installing the plastic.
Time required for lawn to die
Green-in-winter lawns take 1 month
Brown-in-winter and patchy lawns will take 1 to 2 months
Planting after the lawn has died
Remove the plastic.
Disturb the lawn as little as possible to avoid raising viable seeds and underground stems and roots from below the solarized layer.
The best time to plant is fall. In the fall the soil is still warm, but the days are cool so plant roots grow rapidly. In a typical year, the plants get rain during the winter and have time to develop healthy root systems before they are exposed to the summer heat. The second best time to plant is in the spring. More irrigation water is needed for spring plantings.
One gallon or larger plant holes have more chance of raising viable seeds, underground stems and roots from below the solarized layer.
Apply several inches of mulch around the new plants to reduce new weed sprouts and conserve water for the new plants.
Watch the edges and seam areas for lawn and weed growth and remove plants promptly. Be vigilant and watch for Bermudagrass or other persistent weed sprouts for up to 2 years. It is easier to get rid of weeds if they are removed when they are small.
Lawn Type | Sheet Mulch | Solarization | Sod Removal | Herbicide
Sod Removal
Lawn types sod removal works for and when to start
Works for green-in-winter lawns. For these lawns, this is the fastest method for lawn removal. Start any time of year.
Brown-in-winter and patchy lawns regrow from roots below the removed strips. Lawns containing Bermudagrass, nutsedge, dallisgrass, bindweed and other invasive weeds are not good candidates for sod removal because cutting at the soil line does not kill roots below the removed sod. Be sure to cut these types of sod when they are actively growing (spring through summer) so you can monitor regrowth before winter dormancy.
Lawns with a lot of surface tree roots are not good candidates for sod removal. Both shovels and sod cutters will damage roots. Large roots will need to be avoided.
Site preparation
Water the turf area so the soil is moist at least 4 inches below the surface.
Mark any sprinkler heads in the area to be cut to avoid damaging them and for potential future conversion to drip irrigation.
How to remove sod
Manual sod removal
|
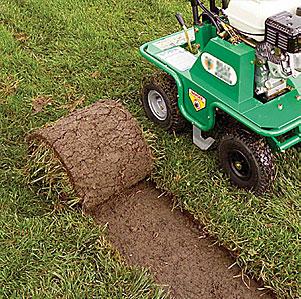
Motorized sod cutter
|
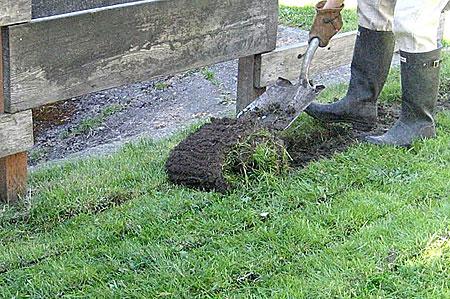
If using a flat shovel, start with a spade or edger to cut the turf into long strips. These cuts should be about 4 inches deep, and about the width of the shovel apart. Once the sod is cut in strips, you can start at one end of the strip and slide the flat shovel under the sod cutting the roots. This method works best for small lawns.
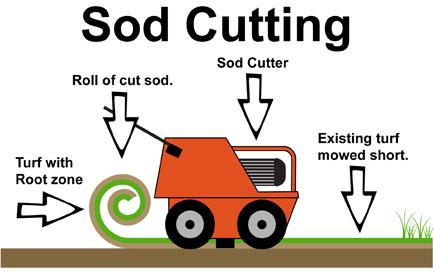
A motorized sod cutter cuts grass at the roots so you can remove entire sections of sod and expose the bare ground beneath. They are very powerful and can be difficult to maneuver.
Once sod strips are separated from the soil, start at one end and roll it up or cut into pieces.
What to do after removing the sod
Sod removed from green-in-winter, weed-free lawns can be added to the compost pile. It can also be laid grass side down as mulch or can be used to create a mound.
Sod removed from brown-in-winter and patchy lawns should be disposed of to avoid spreading weed seeds and plant parts that will root and grow again. The newly exposed area should be monitored for regrowth from roots and seeds. Irrigate the area, and in 1 or 2 weeks, weed seeds and regrowth should begin to appear. Another method for killing the lawn may be needed if regrowth is rampant.
Time required for lawn to die
Green-in-winter, weed-free lawns die as soon as they are cut from the soil.
Brown-in-winter and patchy lawns can take up to 6 months or more until underground roots and weed seeds are no longer active.
Planting after the lawn has died
After removing the top several inches of soil with the sod, you may need to replace it or add soil amendments like compost to the area. Soil/compost blends (planting mix) are available for pickup or delivery at garden centers and sand and gravel dealers.
It is best to work the amendments or planting mix into the native soil. Soil needs time after a disturbance like this to rebuild the micro-organisms that convert nutrients for plants to use. Use the time to plan the new landscape.
The best time to plant is fall. In the fall the soil is still warm, but the days are cool so plant roots grow rapidly. In a typical year, the plants get rain during the winter and have time to develop healthy root systems before they are exposed to the summer heat. The second best time to plant is in the spring. More irrigation water is needed for spring plantings.
Be vigilant and watch for Bermudagrass or other persistent weed sprouts for up to 2 years. It is easier to get rid of weeds if they are removed when they are small.
Lawn Type | Sheet Mulch | Solarization | Sod Removal | Herbicide
Herbicide
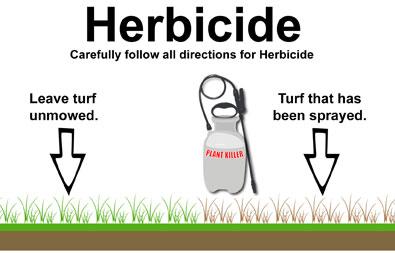
To kill lawn, especially one with persistent grass like Bermudagrass, use a post-emergent non-selective product such as glyphosate, the active ingredient in Roundup™. Glyphosate is systemic, which means it kills not just the top growth but also the root of the plant. It works best on actively growing plants and temperatures of at least 60°. The optimum temperature for quickest plant kill is 75° to 85°. Glyphosate will kill any plant it comes in contact with but has a relatively short life in the soil/water. Pre-mixed hand sprayers of glyphosate products are available, or you can buy concentrate and mix your own. Read the label directions for use or mixing. A sprayer used for glyphosate should be reserved for killing plants only and should not be used to spray any other product in the garden.
Lawn types herbicide works for and when to start
Works for green-in-winter lawns that are actively growing and not drought stressed.
Brown-in-winter and patchy lawns should only be treated during active growth and warm temperatures. It only works when it contacts the foliage of the plant. Because they regrow from roots and seeds, you may need three applications of glyphosate. Wait several weeks between sprays to be sure new growth has stopped.
Start in spring through early fall when the grass to be killed is actively growing.
Site preparation
Water well for at least 2 weeks and allow the area you are treating to grow to a height of about 6 inches. Nitrogen fertilizer will speed plant growth. Grass with a larger leaf surface quickly absorbs more herbicide.
Applying the herbicide
Avoid spraying on windy days or if rain is predicted within 24 hours. Wear protective clothing and be sure to read and follow the directions on the herbicide label.
A product like glyphosate will kill anything it contacts; even mist carried on the wind can damage or kill surrounding plants. Spray the grass evenly with herbicide. Carefully avoid spraying desirable plants.
What to do after applying the herbicide
If possible, don’t disturb the treated area for 7 days while grass absorbs the herbicide.
Allow 2 weeks for the entire lawn to die. Then mow and water the area and wait at least 2 more weeks for new growth to appear. If there is no new growth, you are ready to prepare for planting.
If sprouts appear, it is best to wait until they are actively growing and then reapply Glyphosate. Bermudagrass and many weeds may need three treatments, waiting for new growth after each treatment.
Time required for lawn to die
Green-in-winter lawns usually need only one treatment and will die within 2 weeks. Continuing to water and watch for regrowth adds 2 more weeks or a total of 1 month.
Brown-in-winter and patchy lawns, especially if Bermudagrass is present, may need three treatments and may take 3 months or more until underground roots and weed seeds are no longer active.
Planting after the lawn has died
Planting should only take place after the lawn has died. If sprouts still appear, the grass and weeds will return. The grass and weeds compete with the new plantings and weeding will be more work.
Prepare the soil. The best time to plant is fall. In the fall the soil is still warm, but the days are cool so plant roots grow rapidly. In a typical year, the plants get rain during the winter and have time to develop healthy root systems before they are exposed to the summer heat. The second best time to plant is in the spring. More irrigation water is needed for spring plantings.
Apply several inches of mulch around the new plants to reduce new weed sprouts and conserve water for the new plants.
Be vigilant and watch for Bermudagrass or other persistent weed sprouts for up to 2 years. It is easier to get rid of weeds if they are removed when they are small.
Keys to Success
Whatever method you choose to remove your lawn, patience and planning are key. Waiting for the lawn to die gives you time to plan the irrigation and design a beautiful, new low-water garden that will reward you for many years.
Lawn Type | Sheet Mulch | Solarization | Sod Removal | Herbicide
Resources
Bermudagrass, 2007, UC IPM Pest Note #7453,
ipm.ucanr.edu/PMG/PESTNOTES/pn7453.html
Crabgrass, 2010, UC IPM Pest Note #7456,
ipm.ucanr.edu/PMG/PESTNOTES/pn7456.html
Creeping Woodsorrel and Bermuda Buttercup, 2010, UC IPM Pest Note #7444,
ipm.ucanr.edu/PMG/PESTNOTES/pn7444.html
Dallisgrass, 2008, UC IPM Pest Note #7491,
ipm.ucanr.edu/PMG/PESTNOTES/pn7491.html
Nutsedge, 2010, UC IPM Pest Note #7432,
ipm.ucanr.edu/PMG/PESTNOTES/pn7432.html
Soil Solarization for Gardens and Landscapes, 2008, UC IPM Pest Note #74145,
ipm.ucanr.edu/PMG/PESTNOTES/pn74145.html
UC Guide to Healthy Lawns, Kill the Existing Turf and Weeds
ipm.ucanr.edu/TOOLS/TURF/RENOVATE/comkill.html
Weed Control Using Herbicides, 2012, UC IPM Quick Tip
ipm.ucanr.edu/QT/weedcontrolcard.html
Pesticide Active Ingredient: Glyphosate, UC IPM,
ipm.ucanr.edu/TOOLS/PNAI/pnaishow.php?id=37
Pesticides: Safe and Effective Use in the Home and Landscape, 2006, UC IPM Pest Note #74126,
ipm.ucanr.edu/PMG/PESTNOTES/pn74126.html
Alternatives to Lawn, California Native Plant Society
www.cnps.org/gardening/alternatives-to-lawns-5323
Kill Your Lawn!, Tree of Life Nursery, Replacing your Lawn with native Plants
californianativeplants.com/resources/kill-your-lawn/
Lawn Gone! Low-Maintenance, Sustainable, Attractive Alternatives for Your Yard, 2013 (Pam Penick) Ten Speed Press
Lose Your Lawn: the Bay-Friendly Way, Bay-Friendly Landscaping and Gardening
http://www.mrwmd.org/wp-content/uploads/2013/01/Bay-Friendly-Gardening-Sheet-Mulching1.pdf (PDF)
Reimagining the California Lawn, Water-conserving Plants, Practices and Designs, 2011 (Carol Bornstein, David Fross and Bart O’Brien) Cachuma Press.
____________________________________________________
July, 2015. Written by UC Master Gardeners Lorraine Van Kekerix and Jan Fetler. Illustrations by UC Master Gardener William Ingersoll. Reviewed and edited by Judy McClure, Master Gardener Program Coordinator.
____________________________________________________
For a printer-friendly version of this page, click here for Garden Note 161. (PDF 257kb)


