Monthly Vegetable Gardening Tips
Quick links
January | February | March | April | May | June
July | August | September | October | November | December
Note: PDF files open in a new window/tab.
January
Think about seeds
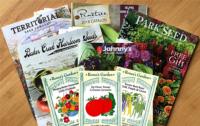
Local nurseries carry a good selection of spring and summer vegetable seeds, but if you are looking for new or unusual vegetable varieties, or even the weird and wacky, catalogs or online stores will open up a whole universe of varieties to try.
When planning your garden, think about growing varieties that you cannot find at farmers markets or grocery stores.
Check out the Sacramento Vegetable Planting Schedule (PDF) (EHN 11) for a general planting timetable.
Plant bare root artichokes
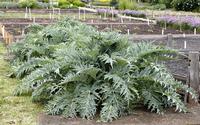
You should be able to find bare root artichoke crowns in nurseries in January. If you want to give them a try, your best bet is to grow them in a location that gets morning sun and afternoon shade. They are grown commercially in the Monterey area, and they prefer a coastal climate. As a result, they tend to suffer in our summer heat, so growing them in an area of your garden that is protected from the afternoon sun will help keep them from stressing too much.
Artichokes are very large plants, so give them plenty of room (4 to 6 feet apart). They also make a great architectural statement, so think about planting one in your landscape. Do not be surprised if the plants slow down and go a bit dormant in summer. When the weather cools down in the fall, the plants should start growing again. Artichokes are heavy feeders, so fertilize them every month with a high nitrogen fertilizer.
Water artichokes regularly during the growing season. If they are grown only for ornamental value, artichokes are fairly drought tolerant; however, they will go dormant in summer heat.
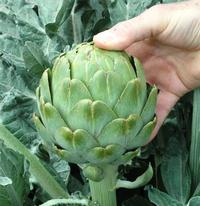
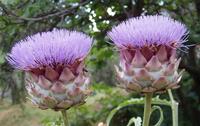
Buds are ready to harvest when they are tight and plump. Cut off buds with 1 to 2 inches of stem. The younger the bud, the more tender it will be. If the buds have gotten away from you and start to open, let them continue to flower. As a member of the thistle family, the large purple flowers are a show stopper and attract honey bees. Click thumbnails for a bigger view:
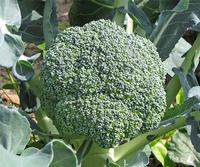
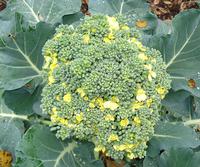
Harvest broccoli and cauliflower
If you planted broccoli or cauliflower last fall, you may be able to start harvesting this month.
Harvest broccoli while florets are tightly closed (before the flower buds open). The immature flower heads, parts of the attached small leaves, and a considerable portion of the stem (4 to 8 inches) are edible. Although you may be able to start your harvest this month, your plants may produce for several months because of production from side shoots between leaf or branch stems after the main one is removed. If temperatures get too high, broccoli will "bolt" into premature flower stalks that will bloom and go to seed. Store harvested broccoli in a plastic bag in the refrigerator. See additional information about broccoli (PDF). Click thumbnails:
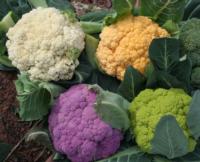
Most cauliflower varieties need about 2 months of cool weather to mature. When the flower heads (curds) of white-headed varieties are about the size of a chicken egg, blanch them by shading out sunlight to keep them white, tender, and mild flavored.
Blanch plants when the surface of the cauliflower is totally dry. To blanch, bend plant leaves over the head and tie leaf tips at the top. Use enough leaves to keep out light and moisture, but allow room to grow and for air circulation. Unwrap occasionally to check the stage of maturity, to dry out after a rain, or to look for pests. Some varieties are self-blanching, and varieties with colored flower heads (orange, purple, green) generally do not need to be blanched.Harvest cauliflower when buds are still tight and unopened. With a sharp knife, cut off just below the head. If heads become over-mature, they tend to segment or spread apart and the surface becomes fuzzy. Use or preserve right away. The 'Snowball' variety may be grown as both fall and spring crops and can produce good heads within 2 months after transplanting. See additional information about growing cauliflower (PDF).
Plant asparagus crowns this month
Asparagus is a perennial, cool-season vegetable, its long spears coming up year after year. So when you make the bed, do it carefully – your asparagus may be growing in it for 12 to 15 years or longer.
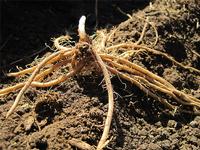
Asparagus grows from seed, but it is easier to buy 1- to 2-year-old crowns. The crowns are actually rhizomes (fleshy stems that store food for future plant growth--see photo below) with roots attached on their under surface and the buds of spears that are just beginning to develop sticking up. UC 157 hybrid is a good variety for this area--it tolerates warmer winters and is resistant to Fusarium. When buying crowns, look for fresh, firm-fleshed roots. If they are shriveled or brittle, they may be old and won’t produce well, if at all. Plant crowns while they are dormant.
Plants need full sun, good drainage, and, most important, well-prepared soil enriched with lots of organic matter (well-rotted manure, compost, bone or blood meal, leaf mold). Asparagus is a good candidate for raised beds. Dig a 6 inch deep trench 12 to 18 inches wide and spread crown roots over slight mounds of soil spaced 12 inches apart; cover with 2 to 3 inches of soil. As plants grow, pull soil over the crowns until the trench is filled.
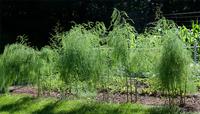
Let spears grow the first year without harvesting any spears (this allows for good root growth); after spears shoot up, let them leaf out (picture below) so that the foliage can nourish the growing roots and rhizome for future production. Then harvest lightly for 3 to 4 weeks the next year. The fleshy root system still needs to develop and store food reserves to support perennial growth in future seasons. Plants harvested too soon or heavily may be weak and spindly and the crowns may never recover. Future harvests may be for 6 to 10 weeks per year.
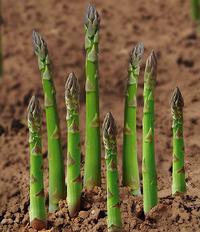
Harvest spears daily during the harvest period when spears are 6 to 8 inches tall and the tips are still tight. If the asparagus is allowed to get much taller, the bases of the spears will be tough. Snap or cut off each spear just below the soil surface. Cutting too deeply can injure the crown buds that produce the next spears.
When harvest is over, allow spears to grow and leaf out. This helps transfer energy to the roots for good spear development the next season. Asparagus has an attractive, fern-like foliage that makes a nice garden border. The tall growth can shade out other plants, so keep this in mind when deciding where to site your asparagus bed. Some gardeners prefer to support the growing foliage with stakes and strings to keep it tidy. Cut the foliage down to 2 inch stubs after freezing weather or when the foliage turns yellow. A 4 to 6 inch mulch of compost, composted manure, leaves, or other material added at this time will help control weeds and add organic matter and nutrients.
Weed the bed each spring before the first shoots come up to avoid accidentally breaking off spears. During production, it is best to pull rather than hoe weeds, if possible. A light mulch helps keep the soil surface from becoming too hard for the shoots to break through easily. Irrigate the bed during the summer for good spear production.
For additional information, see Growing Asparagus in the Garden (PDF) from the UC Davis Vegetable Research and Information Center. Click thumbnails:
February
Sow seeds of cool-season crops
Beets, carrots, lettuce, and peas can be planted into the garden from seed this month. See Sacramento Vegetable Planting Schedule (PDF) (EHN 11) for a general planting timetable. Also see the August tip for some of the beet and carrot varieties that Sacramento County Master Gardeners have successfully grown.
Peas are classified as bush or pole (vine) varieties. Some are for shelling, some have edible pods (sugar snap and snow peas), and some can be eaten either way (refer to seed packet). Tender new growth (pea shoots) can also be eaten raw or cooked as an alternative to spinach. Peas are easy to grow when conditions are right (need coolness and humidity) and are best grown in full sun with good air circulation. Warm weather shortens the harvest season. Bush peas have a shorter, earlier production period than the pole types. Since pole types are vines, they require some type of support, such as bamboo or stick teepees or trellises. Try to avoid overhead irrigation as it can increase the incidence of powdery mildew (although if we get a lot of rain...fingers crossed...powdery mildew is always a possibility). Look for varieties that have resistance to powdery mildew. Additional information on peas (PDF).
Harvest pea pods when they are tender enough to be crushed between the fingers without separating into halves. Harvest the edible pod types at the first sign of seed development. Since the sugar content of peas readily converts to starch after picking, cook, can, or freeze them soon after shelling.
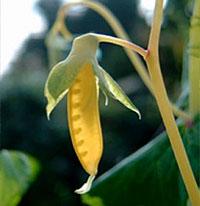
'Golden Sweet' (snow pea)
|
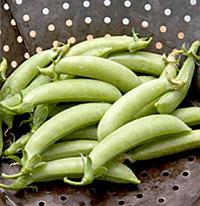
'Sugar Snap'
|
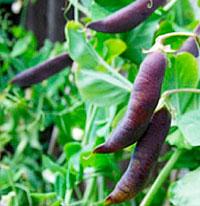
‘Blue Podded Blauwschokkers’ (shelling)
|
Plant seed potatoes
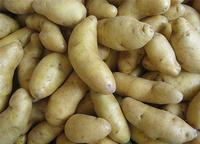
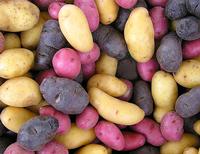
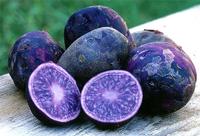
Potatoes come in many sizes, shapes, and colors. They generally have white flesh, but there are varieties that have yellow, red, or blue flesh. See photos below.
Narrow finger-shaped potatoes called “fingerlings” are smaller, longer, and much narrower than the more common and popular potato varieties. Potatoes average 110 to 140 days to mature depending on variety (fingerlings require more time to mature and size up), location, and time of planting.
Potatoes grow from seed potatoes. Seed potatoes are not seeds, but rather a piece of a potato. Do not be tempted to use grocery store potatoes or potatoes from your own garden. Soil-borne diseases, harmless to humans but potentially devastating for a potato plant, can be carried by potatoes. Instead, buy seed potatoes from a nursery that displays a Certified Seed Potato tag or from a reputable mail-order company that certifies the seed potatoes are disease free.
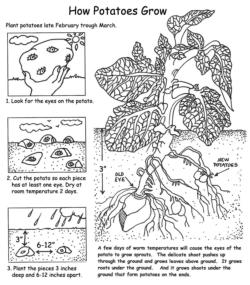
If the seed potatoes are not already cut, cut the tubers into pieces that are about the size of a small chicken egg. You do not need to cut small egg-size seed potatoes. Make sure each piece has at least one eye (small depression where sprouts will form). Store freshly cut pieces at room temperature for 1 to 3 days before planting. This allows the cut surfaces to dry and form a callus, which decreases rotting.Plant when the soil has warmed to about 55°F. In the Sacramento area this is usually late February to early March. A late frost may damage the plants and set them back but is unlikely to kill them. Provide protection for the plants to avoid significant damage. Potatoes need well-drained sandy to loam soil; they do not grow well in heavy soils, so they are a good candidate for growing in raised beds. They do best if grown in full sun. Cultivate the soil well, making sure that it is in a loose, friable (crumbly) condition before planting.
To plant, drop the seed pieces into furrows 3 inches deep with the pieces spaced 6 to 12 inches apart. Closer spacing gives more but smaller potatoes at harvest. Fill in the furrow to ground level. When the potato plants are 4 to 6 inches tall, “hill” them up by mounding soil to cover most of the leaves. Three weeks later hill again. This will make furrows between the rows that are at least 6 inches deep. You can also plant the seed pieces in raised beds: dig 3 inch deep holes using the same spacing and “hilling” technique as above. Apply nitrogen fertilizer at planting time.
Potatoes can also be grown in half wine barrels. Fill the barrel halfway with potting soil (do not use garden soil). Add three seed potatoes, evenly spaced, and cover with about 3 inches of potting soil. As the foliage emerges, fill the barrel with more soil to cover most of the leaves.
Continue adding potting soil as the potatoes grow until the level of the soil is about 2 inches below the rim of the barrel. Mulch the top of the soil with organic mulch (straw, shredded leaves, compost); water and fertilize regularly. Harvest as indicated below by dumping out the barrel, or if it is too heavy, carefully reaching in with your hands to collect the potatoes.
Potatoes are shallow-rooted and need constant soil moisture. If soil dries after tubers have formed, a second growth will start when soil gets moist. This will cause knobby, cracked, or odd-shaped potatoes. Alternate wet and dry conditions can also cause cavities near the center of the potato. Cultivate carefully to remove weeds, taking care not to injure roots and tubers near ground surface.
Blossoming potato plants are sometimes an indication that new potatoes are ready to harvest; however, not all potato plants blossom. About 7 to 8 weeks after the plants emerge from the soil, you can gently use your hands to uncover the sides of the soil mound to harvest small immature tubers--new potatoes, which are extra sweet because their sugar has not yet converted to starch. Take care not to disturb the roots and remaining tubers on the plant. Then carefully pack the soil back around the roots and water the plant well. Be sure that all developing tubers are completely covered by soil. Long exposure to light can cause the skin to turn green. A poisonous alkaloid makes green potatoes taste bitter and should not be consumed.
Most of the crop should be harvested when vines die and/or the skin of the tubers is firm, not flaky. Remove vines before digging the tubers. Dig the potatoes when the ground is dry; dig carefully, making sure you do not injure or bruise the potatoes.
Click pictures to enlarge:
For more information on growing potatoes, see Potatoes, white (PDF, 15Kb) from the UC Davis, Vegetable Research and Information Center. Additional information is available in UC ANR Leaflet 2802, Growing Potatoes (PDF, 129Kb).
March
Cut down cover cropsCover crops planted last fall should be ready to cut down this month. Because the cover crop residue needs to decompose for 3 to 6 weeks before you plant your summer vegetables, count back from your planting date to determine when to cut it down. Cover Cropping in the Home Vegetable Garden (PDF, EHN 87) provides detailed information about growing cover crops.
Start tomato seeds
If you did not start tomato seeds last month, you can do so this month for transplanting into the garden in late April or early May. Use a good seed-starting soilless mix in six-packs or other containers. After sowing the seeds, place planted containers on a seedling heat mat or in a warm place in your house. Bottom heat encourages seed germination. After the seeds germinate, remove them from the heat mat (if used) and place the seedlings in a brightly-lit window or beneath florescent lights. Fertilize the plants with half-strength fertilizer (kelp, seaweed, or fish emulsion are good choices) every 2 weeks. Plants should be ready to transplant into the garden in about 6 weeks after the soil has warmed to about 65°F. For detailed information about starting seeds indoors and acclimating them to outdoor conditions (hardening off), see Vegetable Gardening 101 (PDF) (EHN 96). Sacramento County Master Gardeners have compiled a list of some of their favorite tomato varieties (PDF) (GN 147). Check it out to get some ideas. Also see pictures of our favorite varieties (PDF 2.6MB)
Sow seeds for leeks
Leeks are large, upright, non-bulbing types of onions. They are biennial, which means they germinate and grow in one season, survive the winter, and then flower and set seeds the next season. They thrive in well-composted, well-drained, fertile soil. Plant seeds ¼ inch apart and ¼ inch deep in flats that contain a well-draining soilless mix. Plant in the garden when plants are about 8 to 12 inches tall and slightly thinner than a pencil (ideally, but a little thinner is okay), around June or July. Gently remove the plants from the flat, then trim the roots to about 1 to 1½ inches and trim the tops to about 3 inches.
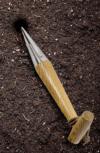
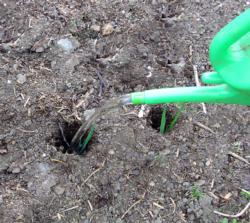
Because leeks need to be blanched to increase the length of the white stem, soil can be mounded around the plants as they grow, or the stem can be set deeply into a trench or hole and gradually filled in. The method used by Master Gardeners at the Fair Oaks Horticulture Center is to plant leeks in individual holes. Use a dibber, also known as a dibbler, or 1 inch thick stick (a broom handle works well) to make 6 inch deep holes about 6 inches apart (see photo). More space between plants results in fatter leeks, and less space produces thinner leeks. Place a leek seedling into the bottom of each hole and dribble in water that contains a small amount of fish emulsion. By dribbling the water along the sides of the hole, soil will slough off and settle around the roots, partially filling the hole with soil. Do not completely fill the hole with soil; rather, fill in the hole gradually each time the leeks are watered, being careful to avoid covering the growing point of the seedlings (the point where the leaves fan out) with soil or the plant can die. Keep the plants mulched with straw or other organic matter and do not let them dry out. Leeks that suffer from lack of moisture grow unevenly and have a pithy texture.
Begin harvesting when the leeks are about ½ to 1 inch in diameter (around October or November) and continue harvesting, taking the largest plants, until around mid-March. Plants will start to bolt (flower and go to seed) in spring, so be sure to harvest all of the leeks before they get over-mature, when the flavor can get bitter. Here is an easy way to harvest individual leeks without harming neighboring plants: Using a flat-tipped spade, plunge the spade straight down between plants, continuing on all four sides of each leek to be harvested. This severs the roots, making it easier to remove the plant. Then lift up each plant with the spade. Grasp the shank and pull it from the soil. If you try to remove the leeks without first severing the roots and loosening the soil, simply pulling them from the ground can break the stalk. Shake the leek to remove excess soil, trim the roots, and then rinse each plant with a garden hose to remove soil (leeks tend to hold a lot of soil).
Amend your soil
Amend the soil in vegetable beds to get them ready for planting when the soil warms up to around 65°F and nighttime temperatures are above 50°F. Good soil amendment choices are compost, well-rotted manure, composted ground bark, last year's rotted straw, or other organic material. This will help sandy soil retain water and provide better drainage in clay soil, as well as improve the texture of both types of soil. Add a nitrogen fertilizer at planting time if a soil test indicates nitrogen is needed.
Check soil moisture
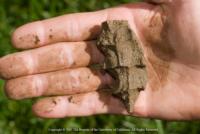
Let your vegetable garden soil dry out a bit. It should be moist but not wet, and dry enough to crumble when pressed in your hand, before you prepare it for planting. Loosen the soil to a depth of 6 to 10 inches with a spading fork and pulverize any clods into pea-sized granules. Spread fertilizer and compost and then lightly work into the soil, rake it in, and lightly water it in. Your beds are now ready to plant warm-season crops.
April
Plant tomatoes
The unofficial "official" tomato planting day in the Sacramento area is April 28th (Lifetime Master Gardener and radio personality Farmer Fred Hoffman's birthday). If transplants are growing well (stocky, not root bound, and no flowers or fruit) and soil temperatures are around 65°F (usually late April or early May in the Sacramento area), plant them in well-amended beds.
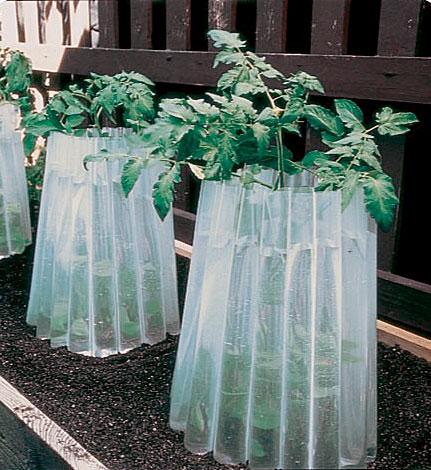
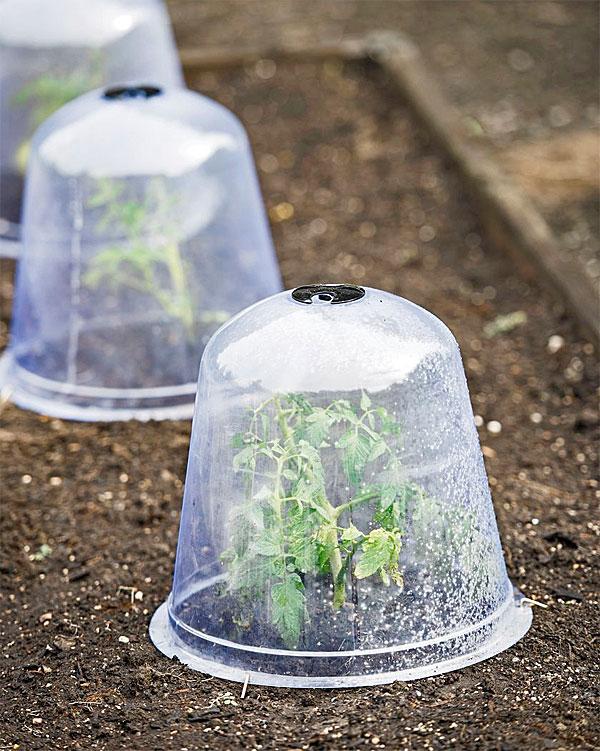
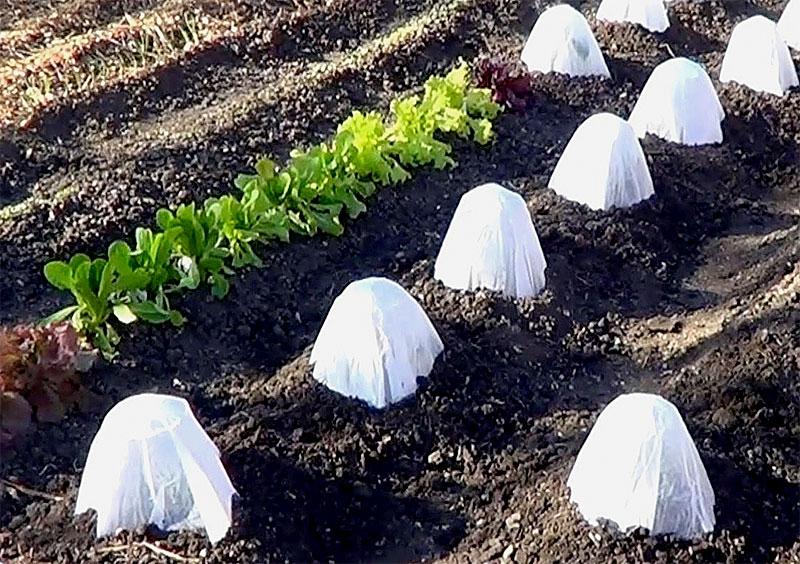
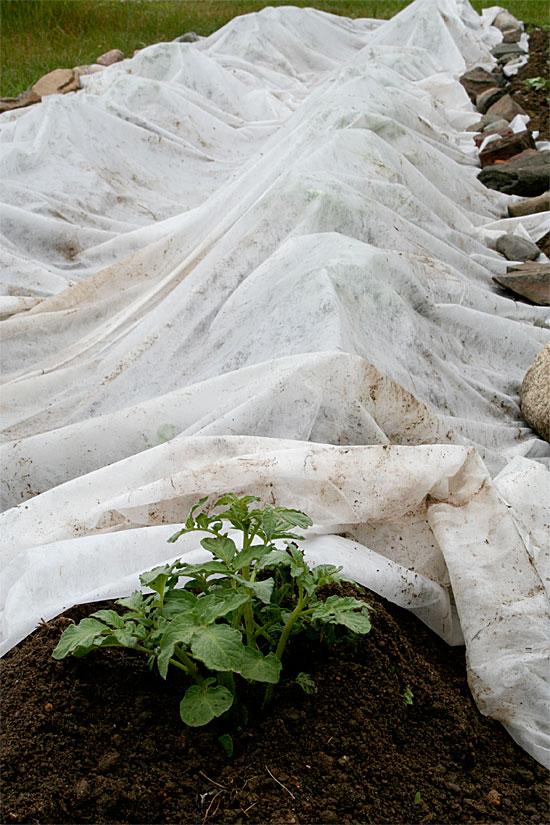
Because the weather can be unpredictable this time of year, take precautions to protect plants if nighttime temperatures get cold. It is not unusual to get rain with hail in early spring. Below are a few choices to provide protection from cold weather. Wall-O-Water, cloches or old-fashioned "Hotkaps" are good choices. Floating row covers (lightweight synthetic fabric) can be used to protect plants from light frost. Click thumbnails below for more bigger picture:
Monitor soil temperature
Check your soil temperature with a soil thermometer or compost thermometer before planting warm season vegetables. If the soil temperature is around 65°F and the nighttime air temperatures are consistently above 50°F, it is time to plant tomato and pepper transplants. Wait until the soil has warmed to 70°F before planting squash and melons. Be sure to provide protection for the plants if the weather turns cold.
May
Melons – Marvelous Melons!
Melons originated in Africa and Southwest Asia then gradually appeared in Europe toward the end of the Roman Empire. Melons were among the earliest plants to be domesticated in both the Old and New Worlds resulting in numerous cultivars worldwide. Interesting information, yes, but not as interesting and “tasty” as biting into a marvelously ripe, sweet, juicy melon!
The following is a general guide with tips on growing melons in the Sacramento Valley. For more detailed information and helpful resources, review our Environmental Horticulture Note Growing Melons in Sacramento (PDF) (EHN 99).
Melons are a warm season crop requiring high temperatures and grow very well in the Sacramento Valley. Depending on the variety, average time required is about 90 days from sowing to harvest.
These are some favorites grown by the Sacramento County Master Gardeners:
- Muskmelons— ‘Ambrosia’ Cantaloupe, ‘Hale’s Best’ Cantaloupe, ‘Sweet ’n Early’ Cantaloupe, ‘Hearts of Gold’ Cantaloupe, ‘Honey Girl Hybrid’ Charentais , ‘Arava’ Galia, ‘Crème de la Crème Hybrid’ Ananas
- Late melons— ‘Bartlett' Honeydew, ‘Crane’ Crenshaw, ‘Burpee’s Early Hybrid’ Crenshaw, ‘Lambkin Hybrid’ Piel de Sapo, ‘Amy Hybrid’ Canary
Plants can be started indoors in pots a few weeks before planting, or sow seeds in the ground ½ to 1 inch deep. Melons can be grown in most types of soil conditions but prefer light, well-drained soils high in organic matter. When planting, choose a site that gets full sunlight. Optimal soil temperatures should be between 68° and 78°F with nighttime temperatures consistently above 50°F. This is typically late April or May in the Sacramento Valley.
Bees are important in transferring pollen from the male flowers to the female flowers for fruit to develop. Plant melons in a sunny location near a pollinator plant that attracts bees to help encourage successful pollination. At the Fair Oaks Horticulture Center, 'African Blue' basil is a favorite flowering plant to attract bees.
When fruits begin to form, melons in contact with soil may develop rotten spots or be damaged by insects. To avoid this problem, place a board or a few inches of mulch beneath each fruit.
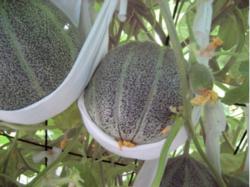
Another option is to grow vines vertically. A single melon plant can spread its vines over 16 to 24 square feet of soil, so training melons to grow on a trellis, fence, or concrete reinforcing wire is a good solution to avoid rotten spots and damage by insects. Growing melons vertically will also save space, simplify harvesting, and improve air circulation to prevent powdery mildew.
Keep soil evenly moist and give deep soakings until fruits reach mature size. Reduce the frequency of irrigation at the first ripe melon to concentrate flavors and eliminate cracking, but do not allow the plant to wilt. After harvesting the first melons, return to the original watering schedule so the next crop of melons can obtain optimum size.
Remember to mulch soil around plants to help maintain consistent moisture and suppress weeds. Apply liquid fertilizer, such as fish emulsion, when the first true leaves emerge. Both fish emulsion and seaweed/kelp can also be applied when vines begin to sprawl and fruits begin to form.
Check out the September tip for harvesting clues (including the somewhat tricky watermelon).
Plant this month
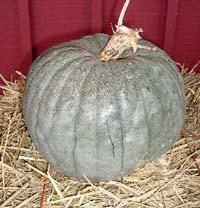
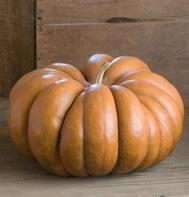
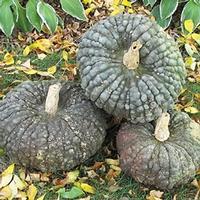
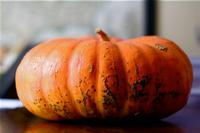
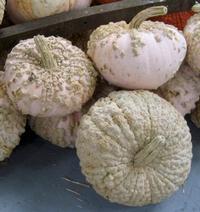
Tomato and pepper transplants can be planted this month. Seeds of pumpkins, beans, corn, squash, cucumbers, and melons can be sown in the garden around the middle of this month. For interesting and unusual fall decorations, consider growing pumpkins or winter squash that are unusual and not your ordinary jack-o-lantern. Here are some varieties to consider.
| ‘Jarrahdale’ - slate, blue-gray; shape is flat, ribbed, and very decorative | ‘Musquee de Provence’ - big, flat pumpkins shaped like a large wheel of cheese; rich brown skin when ripe | ‘Marina di Chioggia’ - large turban-shaped fruits with deep blue-green skin |
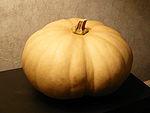
‘Long Island Cheese’
|
||
| ‘Rouge Vif d’Etampes’ - beautiful flattened, ribbed large fruits are a deep red-orange | ‘Galeaux D'Eysines’ - A flesh-colored pumpkin with random warts that look like peanut shells (caused by sugar in the skin as it ripens). The flattened pumpkins weigh 10 to 15 pounds. | ‘Long Island Cheese’ - flat, lightly-ribbed fruits look like wheels of cheese with buff-colored skin |
June
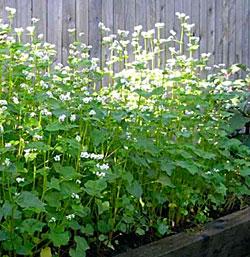
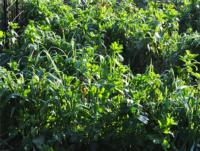
If there are sunny areas of your vegetable garden that will not be planted during the summer, consider growing a summer cover crop. Warm weather cover crops are an excellent management tool for controlling weeds and providing a habitat and food for beneficial insects.
Buckwheat is a broadleaf plant that is one of the best hot weather cover crops because of its ability to produce organic matter. Because of its dense growth, it quickly smothers summer weeds. Unlike legume cover crops (such as bell beans, winter peas, vetch), no inoculant is needed.
It grows to maturity in 30 to 45 days, so several plantings can be sown in one summer. Wait until the flowers begin to bloom, then till it under. Wait about 3 days, then plant a second crop. Repeat. Buckwheat grows so thickly that hardly anything else can find room to sprout and weeds do not get a chance to get started. The height of mature plants varies with soil quality, but it typically grows at least 24 inches tall. It grows in almost any soil, and it absolutely requires warmth, so do not plant it too early.
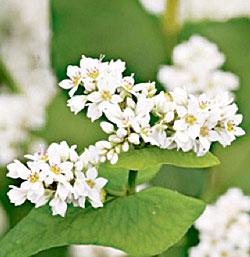
A bed of buckwheat with white flowers is absolutely beautiful. Even though the flowers have a rather unpleasant smell to humans, they are very attractive to honeybees and other beneficial insects and pollinators.
For more information about growing summer and cool-season cover crops, see Cover Cropping in Home Vegetable Gardens. (PDF, EHN 87)
Insects on your crops
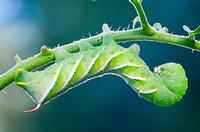
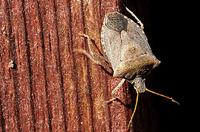
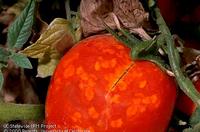
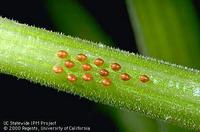
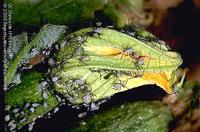
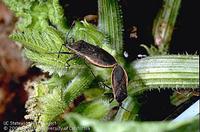
Watch for insects feeding on your veggies. Be sure to check tomatoes for hornworms and stink bugs. Also look for squash bugs on squash and pumpkins. For more on controlling pests in your vegetable garden visit: Summer Vegetable Problems.
Click thumbnails to enlarge.
Handpick the critters and drop them into a bucket of soapy water. If you are not squeamish, you can also step on them or cut them in half with pruners (instant gratification!). For more information about these and other insects, check out UC IPM Online for tips on how to manage pests on vegetables and melons. Also visit our Vegetable Problems in Summer.
July
Harvest cherry tomatoes
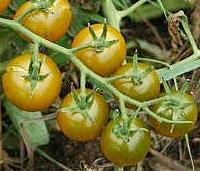
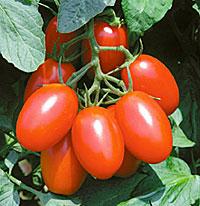
Planting, training/caging, fertilizing, and watering needs are comparable to other non-cherry tomato varieties. Remember to water established plants when the soil dries to about 2 to 3 inches deep, and then irrigate to wet the root zone thoroughly. Watering needs will vary with weather/temperature and root depth. Plants grown in containers or hanging baskets may need to be watered daily if the weather is hot and/or windy, so check the soil regularly. Be sure to add mulch around the base of the plant to keep the soil from drying out and to minimize water usage. To boost growth, use fish emulsion or another mild nitrogen fertilizer when the plants set their first fruit and every 4 to 6 weeks thereafter. However, since water and nutrients leach quickly out of container-grown plants, fertilize with half-strength fertilizer every 2 to 3 weeks and keep the soil evenly moist. Fertilize according to manufacturer’s directions, as too much nitrogen makes plants grow leaves at the expense of fruit
Using a wire cage provides both support and training so that the plant can grow vertically. The following are some of the benefits of growing vertically:
- saves space
- better air circulation to avoid disease
- leaves tend to shield tomatoes from sun scald
- better productivity
Purchase or construct cages to support the needs and size of the fully grown plant. For example, dwarf varieties require much shorter/smaller cages, while the larger varieties require taller/larger cages for support and training. Planning ahead will result in a more successful garden and a happier gardener!
For additional information, please refer to growing cherry tomatoes (PDF) (GN 109), 2007 cherry tomato demonstration at the Fair Oaks Horticulture Center that included an experiment with red plastic mulch.
Also visit our Vegetable Problems in Summer for information and help with several tomato problems.
Sow some less-thirsty seeds
While there are few annual vegetables that are "drought tolerant," some varieties will grow successfully with less water. Most of these vegetables are heirlooms from arid parts of the world. If you are looking for somewhat drought tolerant beans to grow, here are three worth trying.
| Tepary beans - Grown mainly for dried beans, they are drought and heat tolerant. Plants that are over-watered will produce much foliage but few bean pods. Seeds are smaller than common beans and come in different colors. Use tepary beans in any recipe that calls for dried beans. | 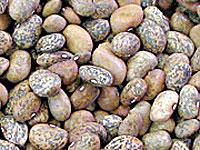
'Blue Speckled' tepary beans
|
| Cowpeas - Beans in the cowpea group, such as familiar black-eyed peas, are drought tolerant to some extent. Usually grown for shelling or dried beans, cowpeas need little water and grow poorly if watered too much. They thrive in heat and full sun. Young cowpea shoots taste similar to mung bean sprouts. Some varieties (right) can be eaten as snap beans, but they are usually grown for shelling or dried beans. |
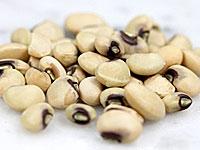
'Purple Hull Pinkeye' cowpeas
|
| 'Bolita' bean - This was one of the original varieties brought by the Spanish as they settled northern New Mexico. With its high protein content, the 'Bolita' bean became an important crop bean. This bean is similar to pinto, only more flavorful, more digestible and cooks faster. 'Bolita' bean is listed on Slow Food USA Ark of Taste, a catalog of over 200 of the best tasting rare, regional vegetables, fruits, and other foods facing extinction. | 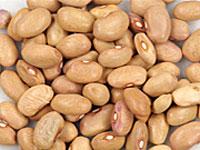
'Bolita' bean
|
Another July tip
August
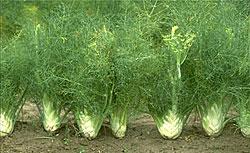
Now that the summer garden is winding down, think about growing something a little unusual...Florence fennel. It is very easy to grow, and the feathery fronds are beautiful in the garden. There are two types of fennel, both of which are in the carrot family (Apiaceae) and have an anise or licorice flavor: One that is treated as an herb (herb fennel – Foeniculum vulgare) and one that is treated like a bulb-type vegetable (Florence fennel – Foeniculum vulgare var. azoricum).
The herb type, which is a perennial, grows 3 to 5 feet tall with fine textured foliage resembling dill. Flat topped clusters of yellow flowers appear in late summer. Stems, leaves and seeds of this type of fennel are harvested and used.
Florence fennel is a tender biennial usually grown as an annual. It is shorter than herb fennel with darker green foliage and is grown for its large, flat, thick rosette of leafstalks at the base (often referred to as a “bulb”).
Often called finnochio in Italy, Florence fennel needs a long, cool season to grow. In the Sacramento area, seeds can be sown in early spring, but you might have better results planting in August so the "bulbs" mature during cool weather. Hot summer weather and lengthening daylight can cause the plants to bolt (send up a flower stalk and set seeds).
Grow Florence fennel in full sun and well-drained soil. Because the plants have a strong taproot that prevents them from being easily transplanted, it is best to sow seeds where you want the plants to grow. Disturbing the taproot can also cause the plant to prematurely bolt. If you choose to grow plants in a container, be sure it is at least 12 inches deep.
After the seeds have germinated, thin them to 12 inches apart. Give the plants regular water and put down a thick layer of mulch such as straw, chopped leaves, or other organic matter to help keep the soil moist. If you did not dig in fertilizer prior to planting, give plants a shot of a complete fertilizer after plants reach 12 inches tall. A "complete" fertilizer is one that contains the three major nutrients needed for plant nutrition: nitrogen, phosphorus, and potassium (the N-P-K on the fertilizer package).
When the bulbs are about the size of an egg, you can blanch the bulbs by piling soil around them. Blanching means to exclude light in order to whiten the stems and improve their flavor. Harvest when bulbs are no more than 3 inches in diameter.
The Sonoma County Master Gardeners have a very informative article on their website you might want to check out: growing Florence fennel.
Consider a cool-season garden
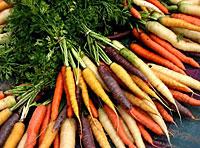
Beet varieties that do well in the Sacramento area are those with a short number of days from seed sowing to maturity (generally those with 60 days or less as listed on the seed packet): ‘Egyptian Turnip Root’ (aka ‘Egyptian Flat’), ‘Ruby Queen’, ‘Golden’ (yellow), ‘Chioggia’ (red and white concentric rings… like a bulls-eye), ‘Albino’ (white), ‘Red Sangria’, and ‘Detroit Dark Red’.
Unusual, colorful carrots that are fun to try include ‘Lunar White’ and ‘White Satin’ (white), ‘Yellowstone’ (yellow), ‘Atomic Red’ and ‘Red Samurai’ (orange-red), and ‘Purple Dragon’ and ‘Purple Haze’ (purple skin with orange flesh).
Sacramento County Master Gardeners have had success growing all of the beet and carrot varieties listed above. See Growing Beets in Sacramento for more information.
September
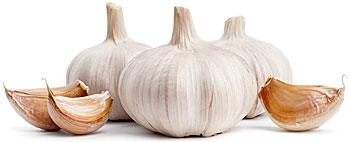
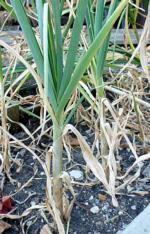
There are two groups of garlic: hardneck and softneck (elephant garlic is not true garlic but is grown the same). Hardneck garlic has a hard central stock and most varieties produce smaller bulbs with fewer, more uniform size. Hardneck varieties also produce very tasty scapes in the spring. Softneck garlic does not have a defined neck and usually produce larger bulbs with more cloves in a more random arrangement of various sizes. These varieties are more commonly sold in grocery stores and are preferred for braiding. Staff at local nurseries can recommend varieties that grow well in your area. It is best to purchase certified disease free bulbs from a certified grower or nursery to avoid introducing pathogens to your garden. While grocery store bulbs can be used, beware as some are treated to retard sprouting. The following are some simple tips that you may find helpful.
Planting site: Select a sunny location that will get approximately 6 or more hours of sunlight throughout the winter months. Avoid planting in areas where alliums (garlic, onions, shallots, and leeks) were previously planted. Practice good crop rotation with alliums. Plant in well drained, preferably sandy loam, soil. Most planting beds will benefit from mixing in 2 to 4 inches of well-aged compost or manure and a balanced fertilizer to start off. Water well the day before planting. Keep the soil moist but never soggy. In gardens where there is limited space or space cannot be dedicated to growing garlic, consider using containers or barrels.
Planting garlic: Immediately before planting pull garlic bulbs apart to separate cloves. Select the largest, unblemished, cloves for planting. The largest cloves, when spaced appropriately, tend to produce the largest bulbs. Plant cloves approximately 4 to 6 inches apart and 1 to 2 inches deep with flat part down and pointed end up. Cover with 1 to 2 inches of soil then cover with a thin layer of mulch. Mulching is important to keep the soil moist but not soggy; allowing the soil to dry out somewhat between watering. Too much moisture can result in mold and rot. If any bulbs succumb to mold or rot, discard immediately. Mulch will also help keep the planting bed free of weeds since the young plants cannot compete for nutrients or sunlight. Other diseases and garden pests to watch out for are Fusarium basal rot, purple blotch, white rot, stem and bulb nematode, mites, snails and cutworms.
Once the garlic begins to sprout in early spring, apply a high nitrogen fertilizer such as fish emulsion. Follow package directions for frequency and amount of application. Stop fertilizing 6 to 7 weeks before harvest.
Harvest: Bulbs are nearing time to harvest when the bottom leaves are beginning to turn yellow. Test by digging one up to check on progress. Cut back on water a couple of weeks prior to harvesting. Harvest when bulbs are big and mature – before splitting or rotting. A spading fork is helpful to loosen the soil and dig up the bulbs. Avoid puncturing, bruising or pulling the bulbs as they are fragile now.
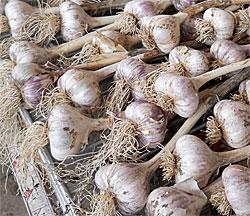
Enjoy your bounty!
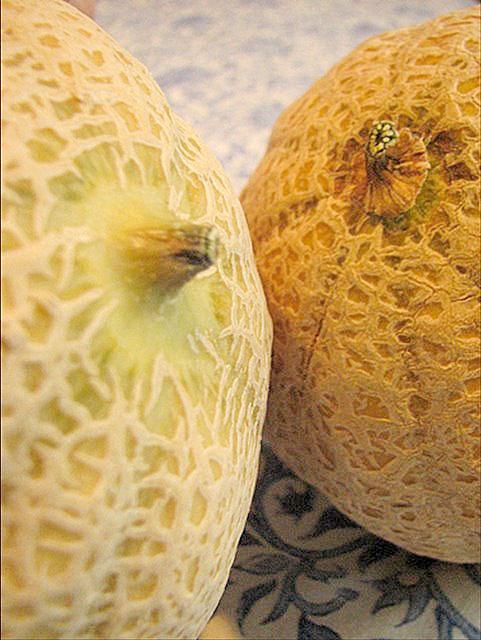
When are melons ready? (click photos to enlarge)Melons may be at their peak this month, but when should they be harvested? Cantaloupe/muskmelon is fully ripe when it pulls off the stem easily (it “slips” from the vine). The photo at right shows full slip on the melon on the right; the melon on the left needs a week or so before it will slip.
With other kinds of melons, a strong, pleasant aroma at the blossom (not stem) end is the best indicator of ripeness. These would include: the green-skinned ‘Persian’, the pink-fleshed ‘Crenshaw’, the yellow-skinned casaba, honeydew, and many European cross types.
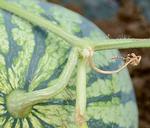
A watermelon is a bit more difficult, but good indicators of ripeness include:- the ground spot (the underside where the watermelon laid on the ground) turning from white to pale yellow
- the tendril opposite the stem of the melon has dried and withered
- the skin of the watermelon has turned from shiny to dull
- there is a dull “thunk” when you rap the melon with your knuckles in the morning.
Then keep your fingers crossed before you cut it from the vine.
October
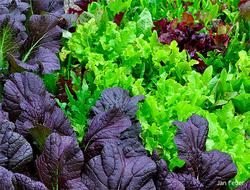
It's not too late to start your winter vegetable garden! Do you enjoy colorful salads, broccoli, cauliflower, chard and more? There are plenty of leafy greens and other cool-season vegetable plants at garden stores now. Lettuce and red mustard shown here grow fast in warm fall soil giving you plenty of salads before winter comes.If you are new to food gardening, you'll find a winter garden has fewer pests, and rain does the irrigation. Try it! Look at the October column of the Sacramento Vegetable Planting Schedule (PDF) (EHN 11) to see what to plant now that you'll love to eat from fall through spring.
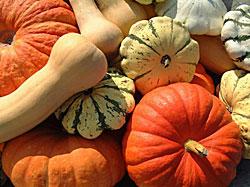
The pumpkins and winter squash that you planted around May are about ready to harvest and use for fall decorations or in recipes. Harvest after the vines have yellowed or dried and before the first frost.
Pick fruits when they are full-sized and well formed, and the outer skin color has evenly changed to its mature color. Give the fruit a "thump" with your fingers - ripe fruit will sound hollow. The stems should be dry and brown, and you cannot easily indent the skin with a fingernail. Use a sharp knife to cut stems, leaving at least 1 inch of stem attached to each fruit. Do not carry fruit by its stem or the stem may break off and the fruit can rot.
Cure pumpkins and winter squash for 2 to 3 weeks in a well-ventilated place out of direct sunlight. This will heal any wounds and toughen up the rinds for better storage. First clean the fruits to reduce surface contaminants (1 part bleach to 9 parts water). After curing the fruits, store them in a cool, dry place. Check them periodically and discard any that show signs of decay.
November
Prepare for winter
If cool-season crops are not going to be grown in your garden, and you have harvested all of your summer vegetables, it is time to get your garden ready for winter. Remove all plant material and dispose of it either in your compost bin or in your green recycle container. Do not put diseased, insect-infested plant materials, or weeds that have gone to seed in your compost, as all disease-producing organisms or weed seeds may not be killed during the composting process.
Leaves are great organic mulch that will help keep the soil from eroding and crusting, and the leaves will break down over time, release nutrients, and help improve the structure of the soil. And red worms love them! If you still have too many leaves, you can stockpile them in large garbage cans or lawn/leaf bags for use during the next year. Be sure to keep them out of the rain.
December
Keep a journal
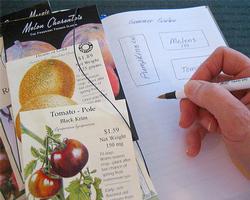
Now that vegetable gardening activities have slowed down, this might be a good time to jot down how your summer garden did. It is helpful to record what vegetable varieties were planted and their location so crop rotation will be easy…you may think you will remember what was planted where, but it is easy to forget unless it is written down. Also make notations of crops and varieties that did well or performed poorly. Record specific garden pest problems and when they occurred. Keeping a garden journal is definitely a great idea.
This is also a good time to clean and oil your tools so they will be ready for next year. Be sure to store them in a dry location to keep them from rusting.
ANR = free publication from the UC Agriculture and Natural Resources Catalog
PN = free publication from UC Integrated Pest Management
EHN = Environmental Horticulture Notes from the UCCE Master Gardeners of Sacramento County
GN = Garden Notes from the UCCE Master Gardeners of Sacramento County
You need Adobe Reader to read the PDF files; download the latest version using the link below.


