Straw Bale Gardening Demonstration 2014
Home » Horticulture Center » Vegetables » Straw Bale Gardening » 2014
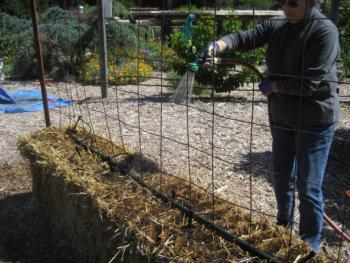
The Master Gardeners who work in the FOHC vegetable garden planted and tended a second straw bale garden demonstration in 2014 using the book Straw Bale Gardens (Joel Karsten, 2013, Cool Springs Press) as a reference. The pumpkins that were grown in 2013 were such a success, and there was so much interest from home gardeners, that we decided to give it another try. The only difference this year is that we used rice straw; last year we used wheat straw. It is important to use straw rather than hay because hay does not have the same water-holding capacity as straw (straw is hollow) and it contains a lot of seeds.
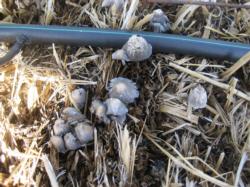
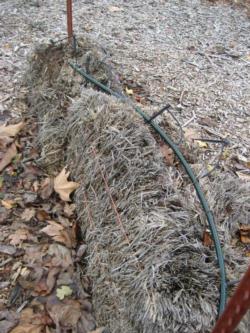
Straw bales are not just the container, but also the growing media. As the straw inside the bale decomposes, it provides nutrients for the plants, then the next year, whatever is left of the bale is used as mulch in our raised beds. The spent bales from the 2013 experiment were used as mulch around all of the vegetables in our raised beds during the 2014 summer. The straw mulch was applied quite thickly because of the drought.


On May 7, 2014, "Rainbow Sherbet" icebox watermelons were planted into the straw (seeds from Renee's Garden). "Rainbow Sherbet" consists of pink 'Tiger Baby', orange 'New Orchid', and yellow 'Yellow Doll'. The plants were trained up a trellis and the fruits were supported with slings cut from old t-shirts.
The same irrigation method (shrubblers attached to ½-inch supply line) and fertilization schedule (monthly fish emulsion) that were used in 2013 were again used in 2014.
The plants grew vigorously and produced many watermelons. We had a bit of a dilemma determining when the melons were ripe. The usual clues included checking the ground spot (the bottom of the watermelon that rests on the ground) to see when it turned from white to pale yellow. The problem was that the fruits were suspended in the air with slings, so there was no ground spot. Following the other clues for ripeness (the tendril nearest the melon turns brown, thumping the melon, and estimating when they should be ripe based on days to harvest listed on the seed packet), we harvested our crop of melons throughout the summer. Unfortunately, many of them were either under ripe or over ripe; however, the ones that we harvested at just the right time were delicious. (For additional information about when melons are ripe, see the September Vegetable Gardening Tip.)

Conclusions: Growing vegetables in straw bales is a great way if your soil has problems (too much clay, soil-borne diseases like verticillium or fusarium wilt or nematodes, weeds that are difficult to eradicate) or if your vegetable garden is in too much shade and you need the flexibility to move the straw bales to a sunny location.
Also, because the straw bales are about 2 feet tall, they are instant (and relatively inexpensive) raised beds with all of the accompanying benefits: less labor (no cultivating or weeding), good drainage, easier on the back (those of us of a certain age or with physical limitations appreciate that less bending is needed). If trellises are installed, plants can be grown vertically, making harvesting the crops very easy.
Resources
- Straw Bale Gardening (PDF) Garden Note 160, explains the basics for starting a straw bale garden in your yard.
- Return to our Straw Bales introduction for links to other years.
- There is also a free ANR publication on straw bale gardening (PDF).
- The book Straw Bale Gardens (Joel Karsten, Cool Springs Press) provides detailed information about setting up the straw bales and all aspects of straw bale gardening. The author's website also provides information and photographs that may be helpful if you would like to try growing vegetables in straw bales.


