About Composting....
Home » Fair Oaks Horticulture Center » Composting » About Composting
Note: PDF files open in a new window/tab.
Getting started
Where to put the pile
Choose a convenient spot that provides enough space for a 3-by-3-by-3-foot pile and plenty of elbow room for turning. Sun or shade isn’t critical because ambient air temperatures have minimal influence on decomposition; it’s microbial action that “heats up” the pile. Make sure there’s a water source close by, choose a bin type and you’re ready to start composting!
Bin type
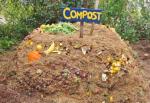
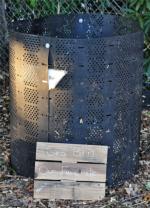
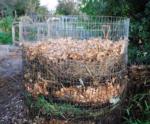
Build your own compost bin using wood, wire, concrete blocks or recycled wood pallets. Check out easy-to-make bin styles online. You can buy prefabricated, ready-built bins; many are made from recycled plastic. Or you can simply start a pile right on the ground. There is no right or wrong way to go.
(Pictures below enlarge.)
Read Composting for the Home Gardener. (PDF 143KB, EHN 98)
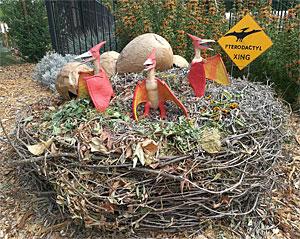
A little more birdnest compost bin fun.
Compost in a hurry
For compost in a hurry, chop garden and kitchen waste into small pieces (2 inches maximum) for faster decomposition. If you don’t have the time or energy for all that chopping don't worry—compost happens. It’ll just take a little longer.
For compost in three months or less, try the rapid or hot pile technique. Build it, water it, turn it regularly, but don’t add to it.
- In your bin, alternate layers of carbon ("browns" such as dried leaves, straw, newspaper) and nitrogen ("greens" such as grass clippings, vegetable scraps, coffee grounds) in a 3 to 1 ratio (by volume).
- If you compost in a pile, layer the waste in a 3 by 3 by 3 foot (minimum) to 5 by 5 by 5 foot (maximum) pile in a 3 to 1 carbon-to-nitrogen ratio (by volume).
Compost piles should be kept moist. - Water each layer as you build. Your compost should be kept as damp as a wrung out sponge.
- Turn the pile or bin every 3 days at first, then once weekly; decomposers need air to survive.
For details see Compost in a Hurry. (PDF) (ANR 8037)
Turning the pile
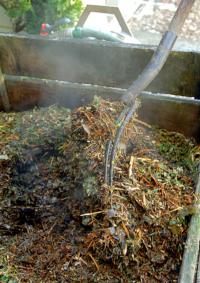
Turning your compost pile every 1 to 2 weeks is the usual recommendation. In spring and summer try to turn the pile every week; in fall, every 2 weeks. For cold composting, if you aren’t in a hurry, once a month should be sufficient. You are trading longer composting time for less labor. Compost happens… You’ll still get there, it’ll just take a bit longer.
Seasonal flower deadheading, spring pruning and garden clean-up provide an abundance of “green” nitrogen rich material, while corresponding “brown” carbon rich matter may be hard to come by. If you saved some fall leaves, you are golden! Shredded newspaper (no glossy ads) or cardboard are handy and inexpensive carbon source.
Compost fork—Decomposer organisms need oxygen to survive, and the pile receives air when you turn the compost. Without turning, the pile will become anaerobic and the compost process will stop.
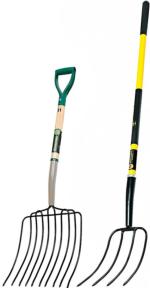
For many gardeners, turning the pile can be the most grueling part of composting. While a shovel or garden fork is adequate for the job, consider investing in a compost fork for maximum turning ease. The thin, round, slightly curved, pointy prongs of this tool slide easily in and out of the densest pile and work well turning materials at all stages of the compost process.
Compost forks are available in 4, 5, 8 or 10 prongs, long or short handled, D-top or straight, metal or composite. Find a compost fork that suits your own personal size, shape and style, and make turn, turn, turning your pile a breeze!
Worm composting
Worm composting (also called vermiculture, or vermicomposting) is the process of growing worms to produce high quality castings (compost) for your garden. All you need to create worm castings is a worm box, bedding material, red wriggler worms (not earth worms) and food scraps.
|
|
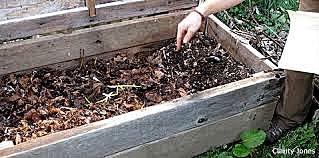
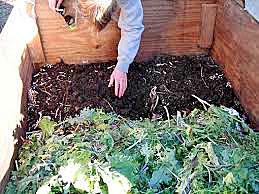
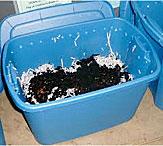
The worm bin—Bins can be purchased or homemade. Use a solid color (not clear) plastic storage box or a sturdy wooden box with a tight fitting lid to keep out pests and protect your worms.
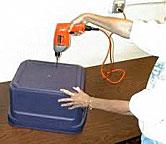
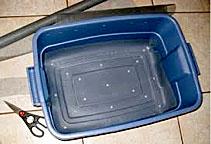
- Drill ¼ inch holes in the bottom to allow for drainage.
- Worms will not escape; they dislike light and will migrate toward the center of the box.
- A 24 by 48 inch bin, no deeper than 12 inches, is a good size for a family of four.
- Moistened, shredded newspaper or corrugated cardboard, shredded leaves, purchased pine shavings or coconut fiber (coir) bedding provides worms with a balanced diet as well as a damp, aerated place to live.
|
|
|
Drill holes on the bottom, sides and top of a plastic bin, add bedding and worms. For more information see The Basic Steps for Creating a Worm Bin. (PDF) (GN 144)
Thirty percent of household waste is compostable. Feed the worms small plant material, fruit and vegetable waste, crushed egg shells, coffee grounds and filters, tea leaves and bags, bread. Do not feed them dairy products, animal products including grease and oils, meat or fish, onion skins, any pet/animal litter or feces or processed food. To avoid fruit flies and odors, cover food with at least 1" of bedding and rotate food placement. Chopping food into small pieces, 1" or less, will speed up the composting process.
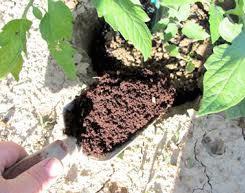
Use the castings in the garden, when transplanting seedlings, or for your houseplants.
Approximate nutrient levels
| Worm castings: | N (Nitrogen) 2.2% | P (Phosphorus) 2.2% | K (Potassium) 1.5% |
| Bat guano: | N (Nitrogen) 10.0% | P (Phosphorus) 3.0% | K (Potassium) 1.0% |
| Cow manure: | N (Nitrogen) 0.6% | P (Phosphorus) 0.2% | K (Potassium) 0.5% |
| Chicken manure: | N (Nitrogen) 1.1% | P (Phosphorus) 0.8% | K (Potassium) 0.5% |
Facts about worms
- Worms can live up to 10 years in a worm bin.
- Worms live 1 to 2 years in nature.
- Worms are hermaphrodites--each worm is male and female.
- Worms have tiny hairs called setae which help them move.
- Worms do not have eyes--they sense light using sensors.
- Red wigglers live in the leaf litter in nature.
- Night crawlers or earth worms live underground.
- If a worm is cut in half it will probably die.
- Red wigglers will congregate in egg shells or avocado peels.
- Worms have gizzards filled with bits of stone and sand which grind their food.
- Worms can eat their weight or more in food everyday.
Using compost
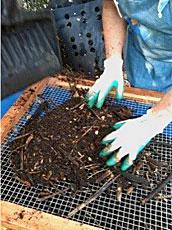
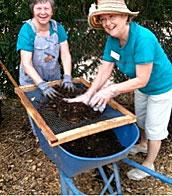
Ready for compost but the compost isn’t quite ready for you? Cut a piece of ½ inch hardware cloth to fit over a wheelbarrow and bind the edges with duct or electrician’s tape. Fork your compost onto the hardware cloth; what sifts through is ready to work into the soil. The rest can go back into the pile to continue composting or be used as mulch.
|
|
|
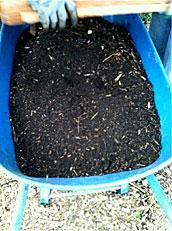
| Use gloves when sifting compost. Anything that sifts through is small enough to be added to your garden soil. | Wheelbarrow full of “black gold” for your garden.
|
Easy-to-make compost sifter.
|
Learn how to make the sifter above. (PDF) (GN 162)
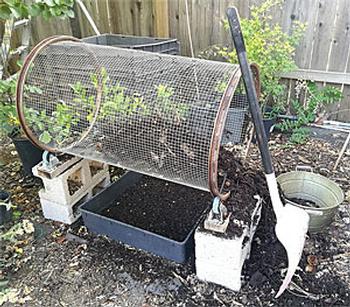
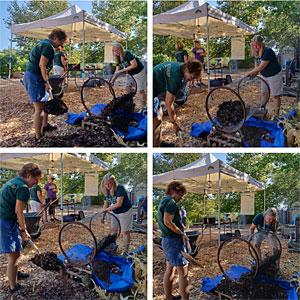
Here is our latest invention--a rotary compost sifter and the Master Gardeners using it. Click the pictures for a bigger view.
Monitor the compost pile
When the temperature changes, especially as the summer months heat up, closely monitor your pile for proper moisture content. High temperatures may require more wetting and turning of the pile. A cover (a tarp, piece of cardboard, or straw) can help prevent evaporation and maintain a more consistent environment that microbe decomposers need to do their all-important job—making compost.
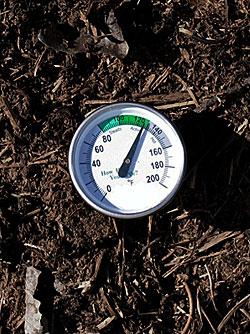
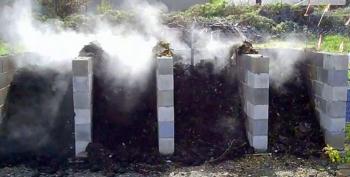
If properly built with the correct nitrogen to carbon ratio, adequate water and air, bacterial populations will increase and generate a large amount of heat as they work to decompose the organic material, significantly raising pile temperature. A daily check will let you know if your pile is heating to the optimal temperature (120° to 150°F) for rapid compost.
Be warned: temperatures above 150°F can begin to kill off the microbe population, actually slowing decomposition. When the temperature reaches 140° to 150°, turn the pile, adding water if necessary, and re-insert the thermometer. Repeat until the pile no longer reaches temperatures above 100°F. At this point, the heat-loving microbes have completed their work, and secondary micro- and macro-organisms continue the composting process at lower temperatures.
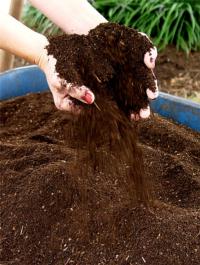
During this curing stage, which can take anywhere from several weeks to several months to complete, your compost thermometer can take a well-earned rest. Finished compost has a crumbly, dark, chocolaty look and a wonderful earthy smell.
A compost pile is its own little ecosystem
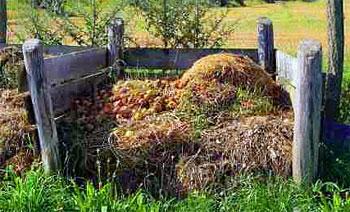
Organic matter, provided by you, coupled with the proper amount of water and oxygen, provides the necessary environment for the micro-organisms and macro-organisms to begin the process of decomposition. For rapid decomposition, micro-organisms (bacteria, fungi and actinomycetes) are especially important in the early stages of the composting process.
Bacteria make up the largest microbe population, and they begin the breakdown of organic material. Many different types of bacteria are at work in the compost pile, and each type thrives on a special set of environmental conditions.
- Psychrophilic bacteria work in the lowest temperature range. They perform best around 45° to 50°F, but can still be active down to 0°. As the psycrophiles break down organic material, they generate a small amount of heat. If conditions are favorable for rapid reproduction, enough heat may be produced to activate the next group of bacteria.
- Mesophilic bacteria, much like humans, prefer moderate temperatures. At the right temperatures, mesophile numbers can double in 30 minutes. Although they can continue their work at temperatures as low as 40° and as high as 110°F, they thrive in the 70° to 90°F range. For “cold compost” piles, these mid-range bacteria do most of the work. However, like their psychrophilc kin, under optimal conditions they may produce enough heat to trigger the real work horses of the microbial world.
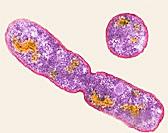 Mesophilic bacteria
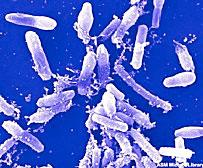
- Thermophilic bacteria kick in and do their best work between 115° and 150°F. They are the are the bacteria "hot composters" strive to activate. Thermophiles work quickly and must be fed new material regularly to maintain the high temperature required for rapid decomposition. Turning the pile (moving un-composted material from the exterior of the pile to the inner core) provides fuel to keep them working at maximum efficiency. When there is no longer sufficient new material to maintain the thermophilic population, the pile temperature will decrease, allowing the mesophilic and psychrophilic bacteria, fungi and actinomycetes to continue the composting process.
Manures in the compost pile
In the not so distant past any and all herbivore manures were unconditionally considered acceptable for composting. Because of the high nitrogen content, fresh chicken, turkey, goat, rabbit, steer and horse manures were enthusiastically sought after and used either alone or mixed with kitchen and garden scraps in home compost piles. However, recent UC research encourages a more cautious approach to the use of animal manures.
Because of the potential for harmful pathogens, UC now recommends that herbivore manures be composted separately before incorporating into the compost pile. The same process of wetting and turning the pile can be used for “pre-composting” any manure destined for your compost pile. A manure pile that reaches and maintains 130° to 150° for at least 5 days will kill most pathogens. Allowing the pile to cure for an additional 2 to 4 months will give the beneficial micro-organism populations time to grow and out-compete any potential disease pathogens.
If you prefer a more hands–off approach, simply allow the manure to sit for 4 to 6 months before incorporating into the compost pile. And remember that cat, dog, and bird feces should never be added to a home compost pile. The waste from carnivorous domestic pets can harbor parasites, bacteria and worms that may persist through the composting process and are dangerous to humans. Their waste should always be flushed or bagged and disposed of in the garbage.
Compost pile safety
Protect yourself while working the pile: always wear gloves, long sleeves, long pants and closed-toe shoes. If you’re sensitive to dust or have allergies, be sure to moisten the pile thoroughly before turning and wear a good dust mask. Change clothes and wash your hands thoroughly after working with compost and before eating or drinking.
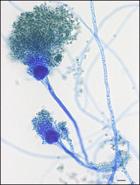
Potentially harmful pathogens can lurk amongst the “good guys,” however, and common sense dictates we take certain precautions when working with compost to protect ourselves. Some bacteria, fungi and parasites can lie dormant in the soil for many years. Some are resistant to very high or low temperature extremes, persisting through the hot composting process or through freezing winter temperatures. Although we can never guarantee a compost pile is free of human pathogens, there are ways to attempt to prevent them from being a problem in the compost pile.
How are pathogens transmitted? Pathogens can be transmitted to humans in three ways:
Ingestion—Although finished compost can look and smell good, ingestion of pathogens usually isn’t an issue when it comes to compost.
Inhalation—Avoid adding materials known to harbor pathogens (such as dog and cat feces) to your compost pile. Ensure the pile is thoroughly moistened before turning to avoid or minimize breathing in harmful dust and germs. If allergies are a problem, take a second precautionary step and invest in a professional grade dust mask.
Absorption—Protect your skin by wearing long sleeves and long pants. Bandage any scrapes, scratches or puncture wounds for an additional layer of protection, and of course always wear gloves when working the pile. Change into clean clothes after working with compost and thoroughly wash hands with warm, soapy water before handling any food or drink.
Who is most at risk? Protection is especially important for immuno-compromised individuals, including:
- allergy or asthma sufferers
- the very young or very old old
- pregnant women
- transplant patients
- HIV/AIDS patients
- cancer patients
| To avoid exposure to potential pathogens, many immuno-compromised individuals may find it necessary, at least temporarily, to suspend composting activities. If in doubt, check with your doctor to ensure composting isn’t hazardous to your health. |
Using fall leaves
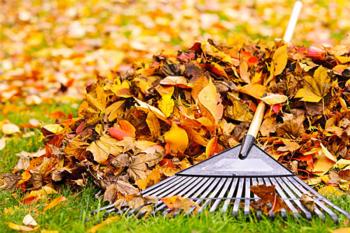
Finding creative ways to utilize this fall bounty can be a challenge for the home gardener, but definitely worth the effort in the rewards your garden will reap. Providing a place for beneficial insects to over-winter, preventing soil crusting and erosion, insulating the soil and providing a slow release of trace nutrients are just a few of the ways leaf compost and mulch benefit our gardens.
While creating your plan to manage this “garden gold” keep in mind the following guidelines:
- Use whole or shredded leaves (or a mixture of the two) as a source of “brown” (carbon rich) material in the fall compost pile. Cover the pile to maintain consistent moisture and keep the microbes working throughout the winter.
- Collect dry leaves in garbage bags to store over winter and use for composting in the spring. If storage space is limited, simply rake leaves into a big pile (or two or three) and let sit outdoors during the cold months. Until mixed with nitrogen rich materials decomposition will be minimal.
- Use as a mulch in garden beds and under trees, from trunk to drip line. Be sure to keep a mulch-free zone 4 to 6 inches around trunks of trees and woody shrubs to avoid crown rot.
- Shred leaves with a lawn mower and leave in place to decompose and fertilize the lawn. (If you don’t have a mulching mower, remove the bagging attachment and you may need to mow over the leaves several times.)
- Do not incorporate un-composted leaves directly into the soil. Microbes, especially bacteria, use nitrogen to metabolize the carbon in the leaves. This will tie up (immobilize) nitrogen in the surrounding soil making it temporarily unavailable to plants. When the microbes die, the nitrogen is released (mineralized) from their decaying bodies and is available to plants once more. Composting leaves and other materials allows this cycle to happen within the compost pile and avoids depriving plants of the nitrogen they need.
- Do not use more than a 2 to 3 inch layer of whole leaves as mulch. When dampened by winter rains these can clump and form a barrier that actually slows penetration of air and moisture to the soil below.
Recycling nitrogen
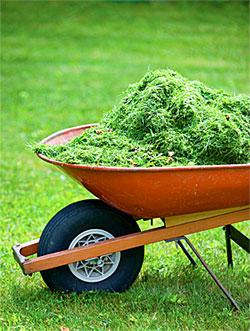
Grasscycling is the natural recycling of grass clippings by leaving them on the lawn when mowing. Grass clippings decompose quickly, returning valuable nutrients to the soil.
Grasscycling saves time and money, and helps the environment. Mowing time is reduced because bagging and disposing of clippings is eliminated. Grass clippings add nutrients and organic matter to the soil and produce healthy, green lawns. Grasscycling reduces turfgrass fertilizer and water requirements, which minimizes chemical runoff entering storm drains and polluting creeks, rivers, and lakes.
Grasscycling also reduces the amount of yard trimmings disposed in landfills. Research has shown that lawns generate approximately 300 pounds of grass clippings per 1,000 square feet annually. This amounts to 6.5 tons per acre each year. Grass clippings are too valuable to throw away, and grasscycling allows reuse of this green material in our urban landscapes.
Soil amendments vs. mulch
Soil amendments—Soils tend to become compacted over time which can impede root growth and decrease the ability of plants to take up nutrients and water. Amendments such as aged and composted manures, or your own home-made compost, when mixed into the soil, will:
- add organic content that improves soil structure, increases soil's water-holding capacity which reduces need to water
- help keep heavy clay soil from compacting, making it easier to work
- give sandy soil better structure
- promote soil fertility
- stimulate healthy root development
- aid in erosion control
Organic soil amendments are not fertilizers. They contain plant nutrients, but their nutrient content is often quite low, and the release of the nutrients to plant-available forms can take weeks, months, or longer depending on the product. For more information about soil amendments including test results of bagged and bulk products available from garden centers, please refer to What's In that Bag—Soil Amendments.
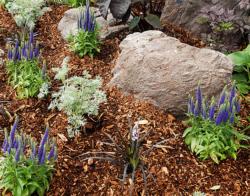
Mulch—A layer of organic material (such as shredded bark, nut shells or compost) placed on top of your soil will:
- insulate the soil, keeping it cooler in summer and warmer in winter
- reduce water evaporation from the soil by up to 70%
- help reduce weed growth
- reduce erosion
- enhance the visual appeal your garden
- break up heavy soils as it decomposes for better water and air movement
- improve water retention and the nutrient content of the soil
Read more about grasscycling and its benefits: Mowing Your Lawn and Grasscycling. (PDF) (ANR 8006)
For more information—
Cornell University Co-operative Extension Agronomy Fact Sheet Series—Fact Sheet 2
“Nitrogen Basics—the Nitrogen Cycle” (PDF) (2005)
Teeming with Microbes: The Organic Gardener’s Guide to the Soil Food Web
Jeff Lowenfels and Wayne Lewis (2010), Timber Press
ANR = free publication from the UC Agriculture and Natural Resources Catalog
PN = free publication from UC Integrated Pest Management
EHN = Environmental Horticulture Notes from the UCCE Master Gardeners of Sacramento County
GN = Garden Notes from the UCCE Master Gardeners of Sacramento County
You need Adobe Reader to read the PDF files; download the latest version using the link below.


