Irrigation Practices at the Fair Oaks Horticulture Center
Chuck Ingels, Farm and Horticulture Advisor
UC Cooperative Extension, Sacramento County
We have found that low-volume irrigation methods shown below have worked well for our sandy loam soil. Most areas are drip irrigated but the main orchard and the citrus row are now irrigated with microsprinklers. Below are the irrigation methods we use and the timings for mid-summer; less time and frequency are used in spring and fall, and no irrigation is used in winter.
| Irrigation Zone |
Irrigation Design |
Run Time and |
| Berry rows |
2 drip tubes 24 inches apart with 1 gallon per hour flag emitters 15 inches apart |
40 minutes, 4 times per week |
| Orchard and |
2 to 4 micro-sprinklers per tree, total of approximately 25 to 35 gallons per hour per tree |
1 hour, 2 times per week |
| Vineyard |
1 drip tube per row with four 1 gallon per hour flag emitters per vine |
3 hours, 3 times per week |
| Potted grapes |
One 1 gallon per hour emitter per pot |
6 minutes daily |
| Vegetable beds |
3 drip tubes 15 inches apart with 1 gallon per hour in-line emitters 12 inches apart |
30 minutes daily |
| Vegetable barrels |
3 mini-sprinklers per barrel |
5 minutes daily |
| Herb beds |
2 drip tubes 18 inches apart with 1 gallon per hour in-line emitters 12 inches apart |
35 minutes, 3 times per week |
| Water-Efficient Landscaping (WEL) |
Drip tubes approximately 2.5 feet apart with 0.6 gallon per hour in-line emitters 18 inches apart |
3 hours, two times per week |
| WEL California |
Drip tubes approximately 2.5 feet apart with 0.6 gallon per hour in-line emitters 18 inches apart |
2¼ hours, two times per week |
Drip irrigation can be an ideal way to water most non-turf plantings. It places an accurate amount of water only where needed with none of the evaporative water loss that can occur with sprinklers. Drip lines can be covered with mulch and kept out of sight, but being unseen means you can’t tell if an emitter is clogged, and they are easily cut when weeding or digging. For these reasons most landscapers dislike drip irrigation. Clogging can occur where water is “hard” (has high mineral content) or when breaks in the tubing or PVC pipes allow debris into the line.
We use flag emitters in areas where we can attach the tubing to a wire, such as in the vineyard, blackberries, and espalier trees. Above-ground flag emitters are useful because you can easily see if they are clogged. The emitters can be cleaned if they do become clogged: firmly hold the emitter and remove the flag to force out a stream of water, then replace the flag. Be aware that flag emitters can be stepped on and broken if the drip line is placed directly on the ground.
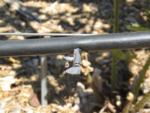
|
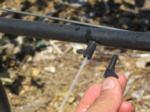
|
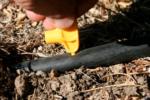
|
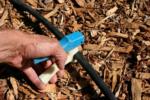
|
| Flag emitter in tubing suspended on a wire | Flag removed to flush clogged emitter; place thumb over open end to flush the emitter opening | Tool to punch holes in drip tubing to insert drip emitters or spaghetti tubing |
Another hole punch tool for drip tubing |
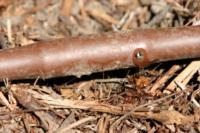
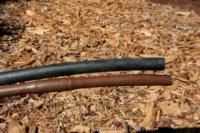
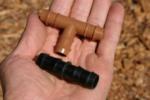
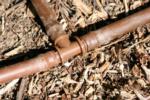
In-line drip tubing is ideal in some respects because you don’t have to plug in emitters, they are simple and accurate, and most are pressure-regulated so they are accurate even on slopes. However, they are also more expensive than plug-in types. Also, the brown in-line drip tubing we use is Rainbird 0.620 inch thick and is very similar to Netafim tubing, which is also commonly used. These are smaller in diameter than the standard black 5/8 inch tubing (actual size 0.700 inch), so it would require different size fittings (such as couplings and tees). We use multi-size fittings that work on either size. We have had multiple blow-outs with the multi-size fittings.
|
|
Left: Drip tubing with in-line emitter, dripping. Right: Standard 5/8 inch black drip tubing (top) and smaller brown in-line tubing (bottom). |
|
|
|
|
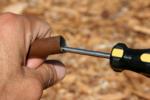
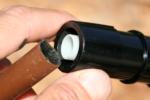
Rainbird in-line tubing being reamed out to fit over white insert in multi-size coupling. Internal fittings are specific to drip tube size – brown is for Rainbird drip tubing and black is for standard 5/8 inch black tubing. Attached tee may be more durable than multi-size fittings.
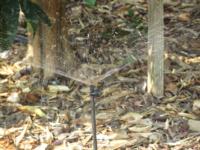
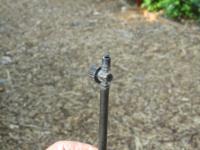
A microsprinkler is connected to spaghetti tubing, which is mounted on a plastic stand. Many types have adjustable nozzles so they can spray a short distance (with low spray volume) or farther (with more spray volume). It is best to direct the spray away from trunks of trees and shrubs to avoid crown rot disease, especially on clay soils.
|
|
Microsprinklers cover wider areas with less tubing than drip. This sprinkler can be adjusted with the knob from about 4 feet to 10 feet in diameter. However, foliage can block the spray. |
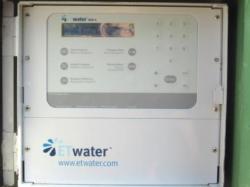
| We have a “smart” controller that can use information from a local weather station, allowing the controller to automatically irrigate based on weather conditions. However, with our diverse landscape areas with both mature and young plants, as well as periodic water main shutoffs beyond our control, we have had challenges maintaining consistently healthy plants when using the smart function. Therefore, we use manually set schedules as shown above. |
|


